I missed out on last years mayfly hatch; by the time my nights had finished the hatch had been and gone and I had only managed a couple of short afternoons beforehand. This year sees my nights brought forward by two weeks - it's a fifty week pattern - and my rest week falls on the last week of May, right in the middle of the hatch.
For some reason I didn't tie any mayfly nymphs last year - I am a confirmed dry-fly fan, but that is not to say I don't fish with nymphs, of course I do, but there is always a preference. I think it is the visual aspect that I has me tying on a dry-fly when I can; you cannot beat seeing a fish rise and your fly disappear.
This time around I have managed to tie a number of nymphs. In the past I used Steve Thornton's Mayfly nymph that he tied with his Virtual Nymph Skin ( see
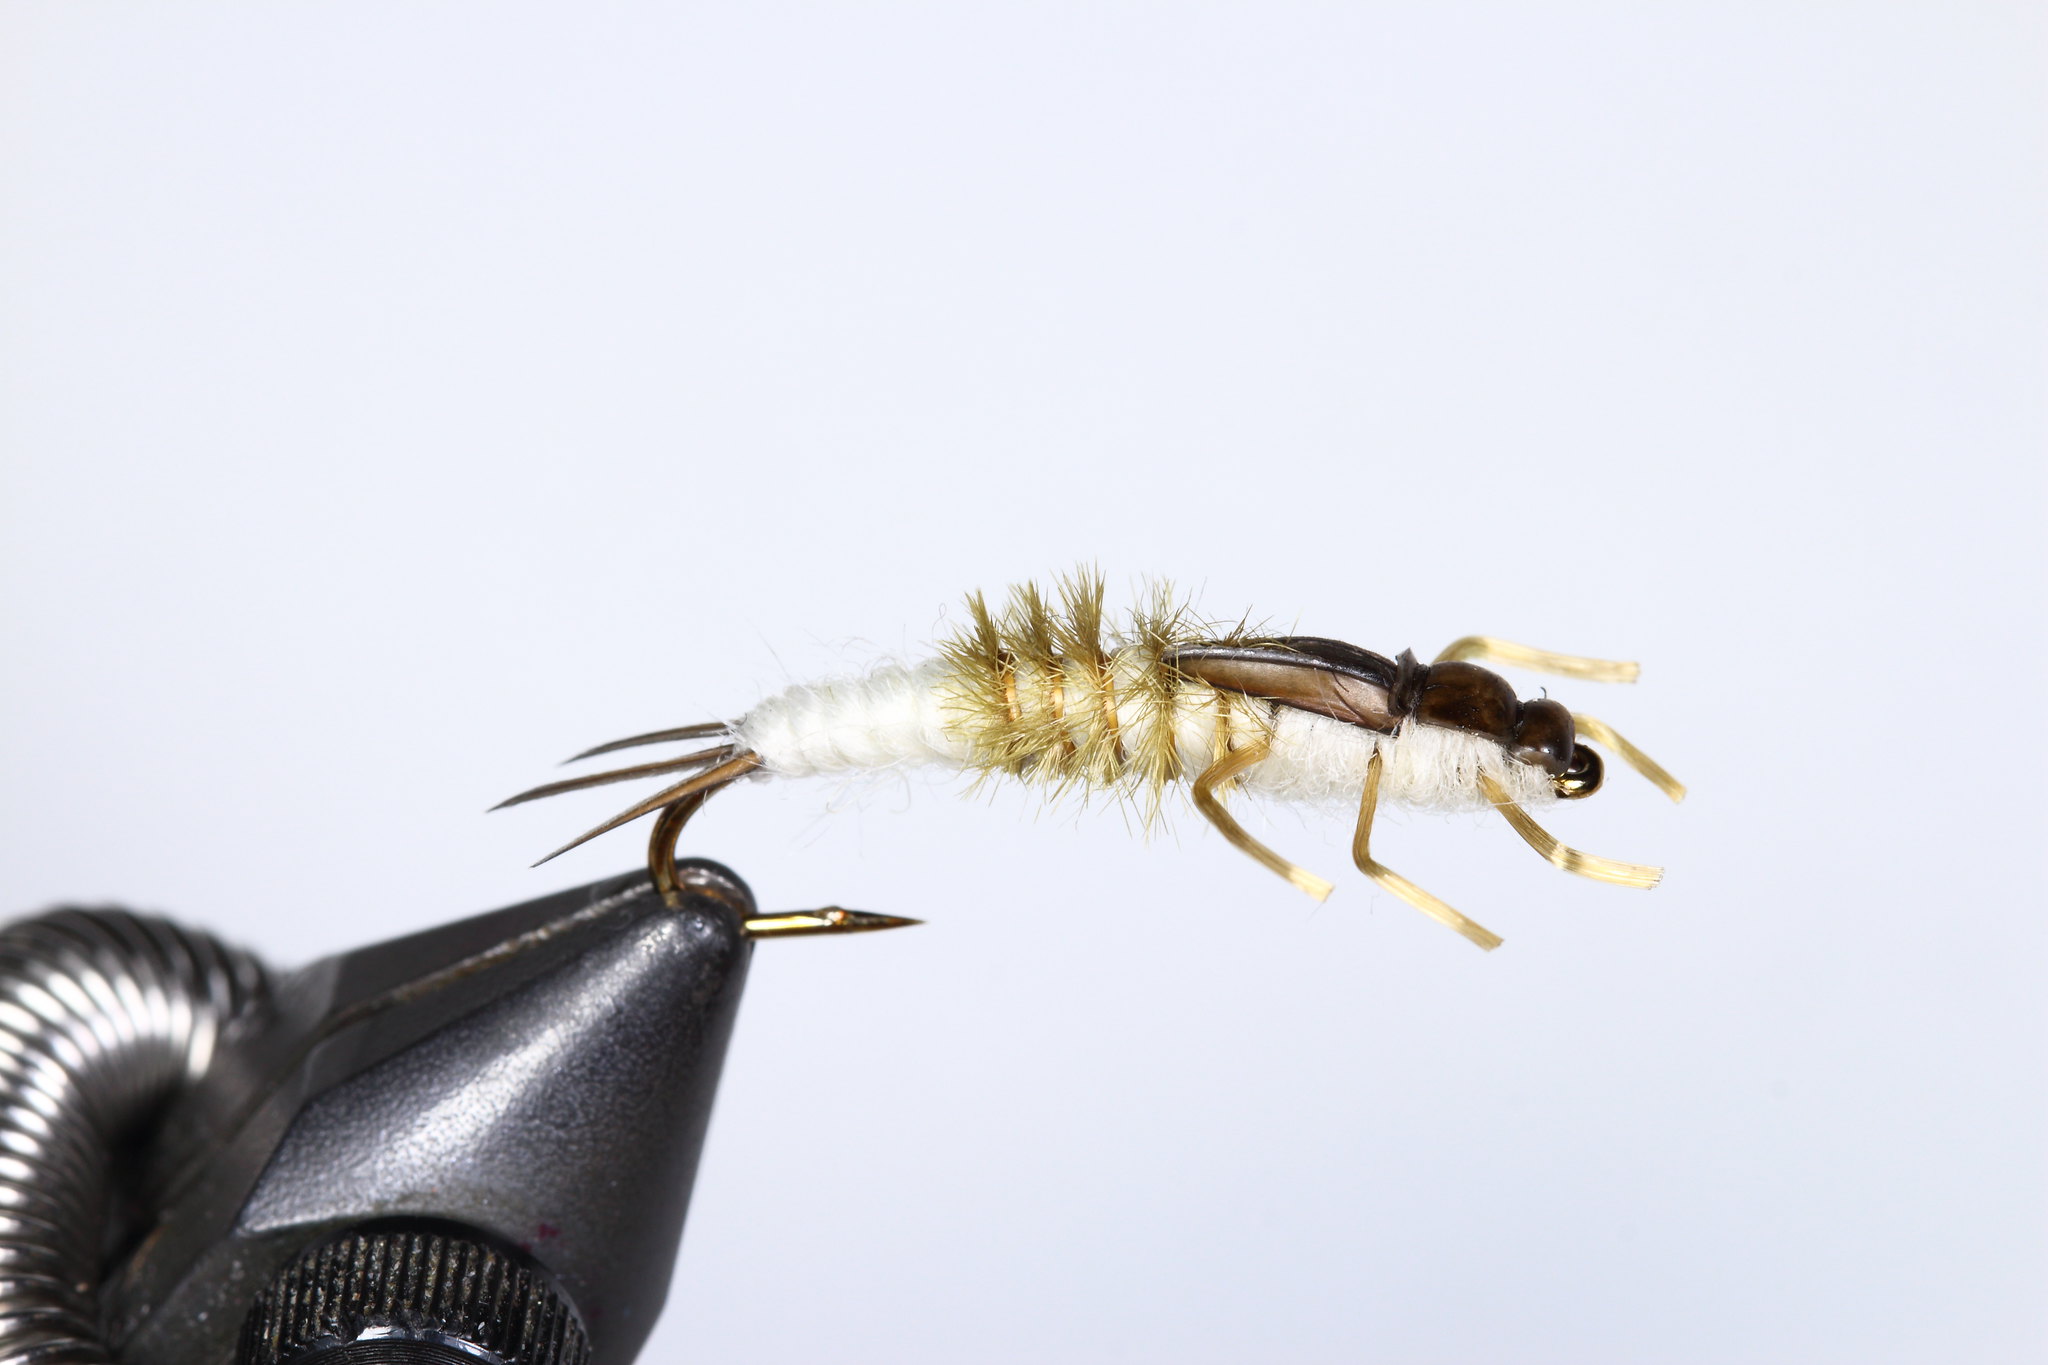
here for a very old SBS I did a few years ago). In homage to this fly and to Oliver Edward's Wiggle Mayfly nymph I have been tying a fly that utilises the tightly wound yarn body from the Wiggle Nymph with the overall profile of Steve's pattern and incorporating kinked rubber legs.
Hook: I use a curved longshank hook, for example Tiemco 200 or Veniard Osprey VH115.
Thread: White 50d GSP
Underbody: Adhesive lead sheeting
Tail: Dark brown goose biots
Body: Cream wool/yarn
Gills: Golden brown dyed ostrich herl
Wing buds: Dark brown goose biots
Legs: Medium Flexifloss/ Large Montana Fly Co. Tentacles in tan, kinked with a hot tip cauteriser
Thorax: Cream dubbing, I used the same wool as the body shredded
Thorax cover: Virtual Nymph Nymph Skin 3mm translucent coloured with dark brown marker
Head and Protonum: Same as thorax.
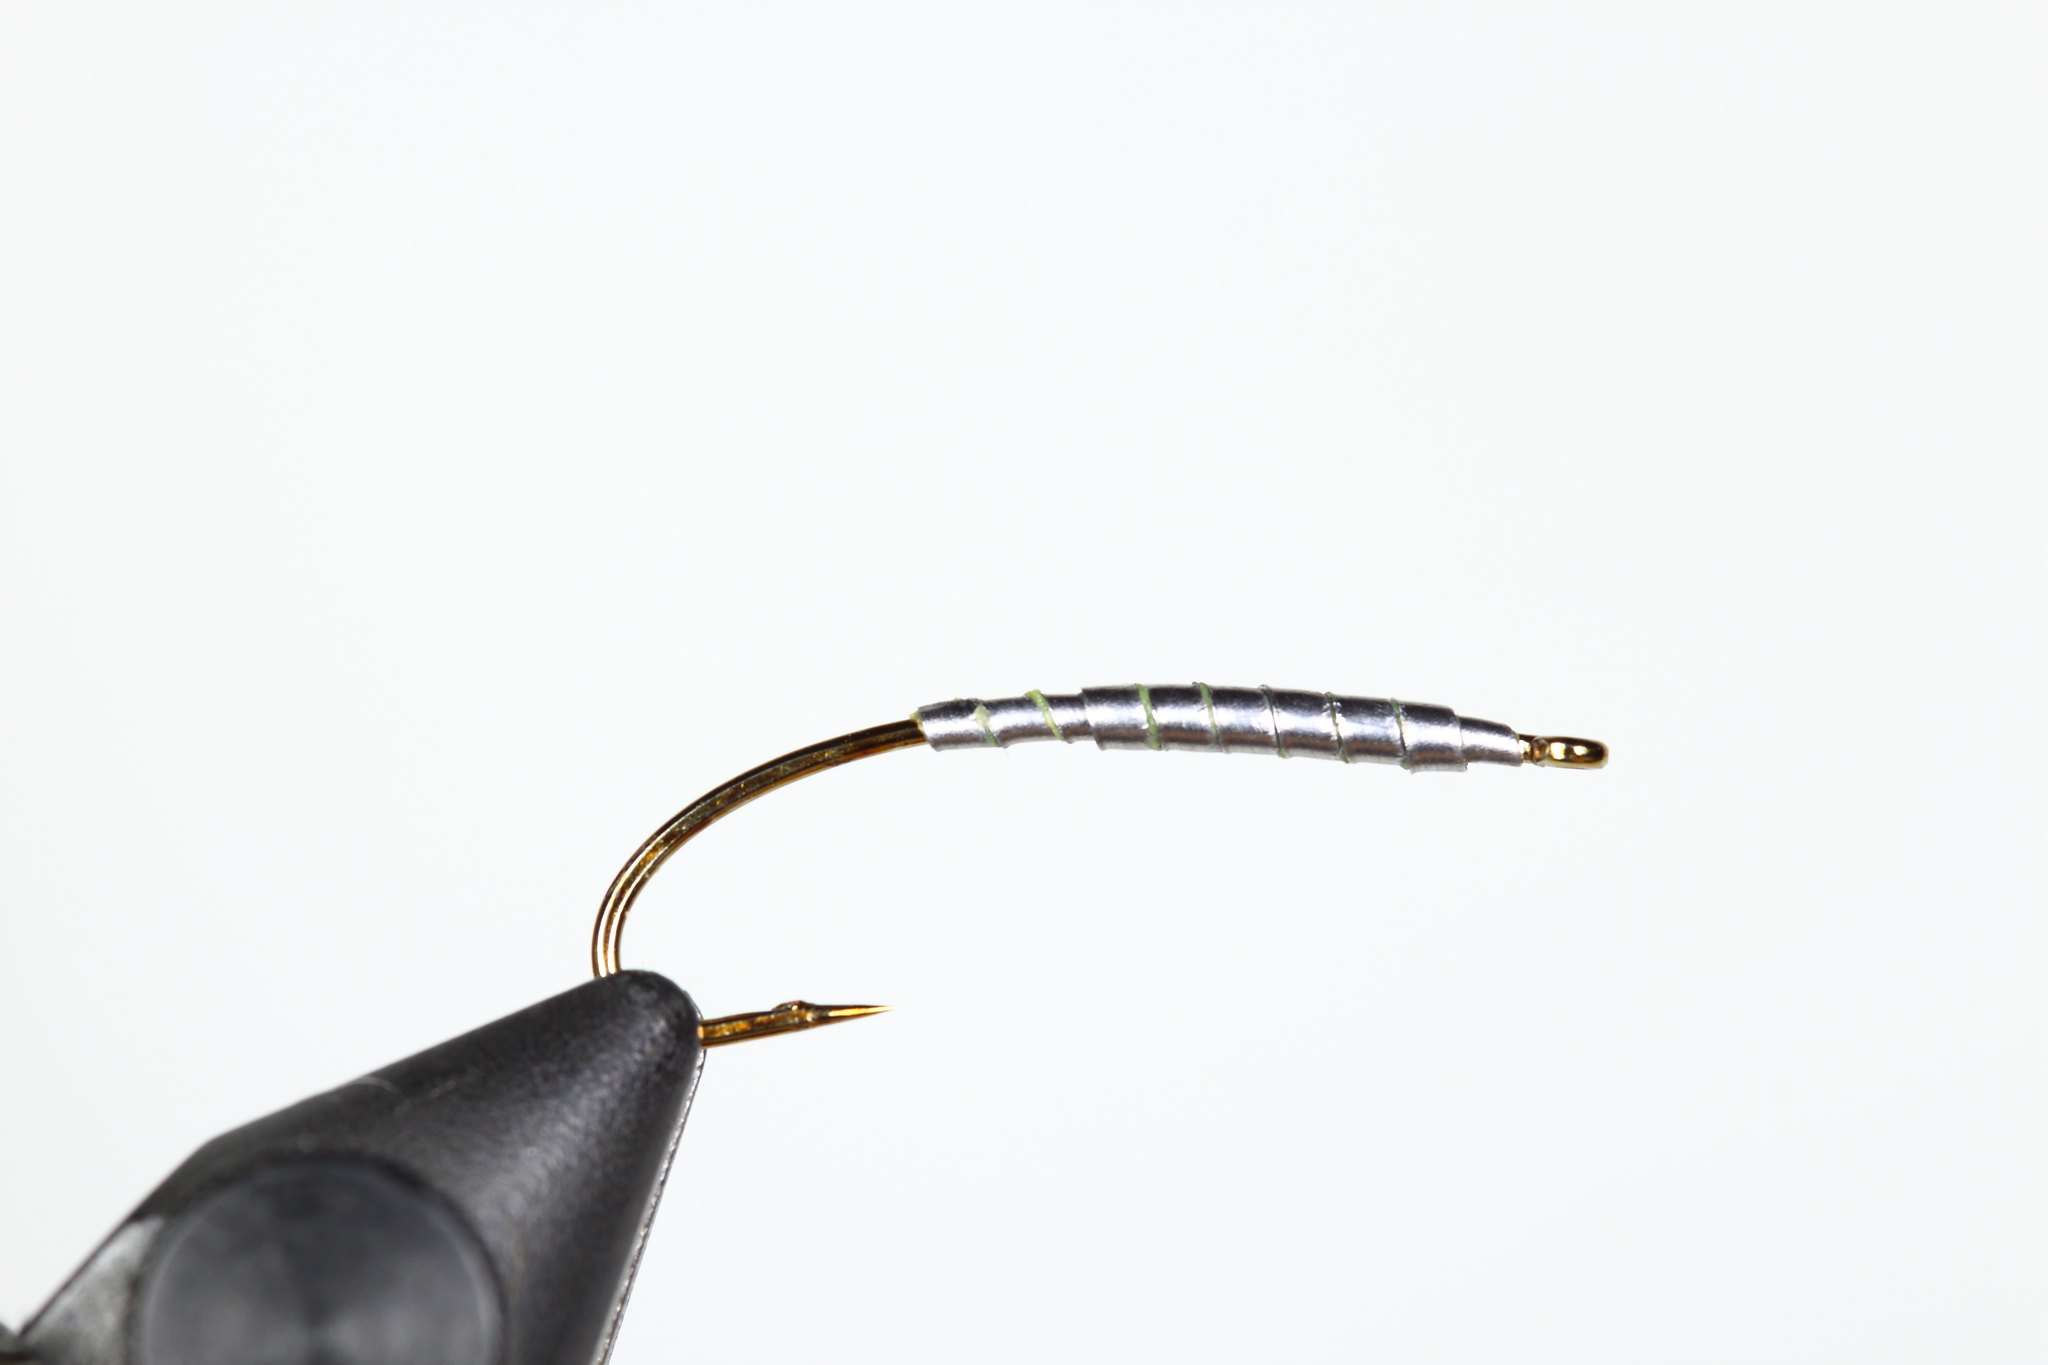
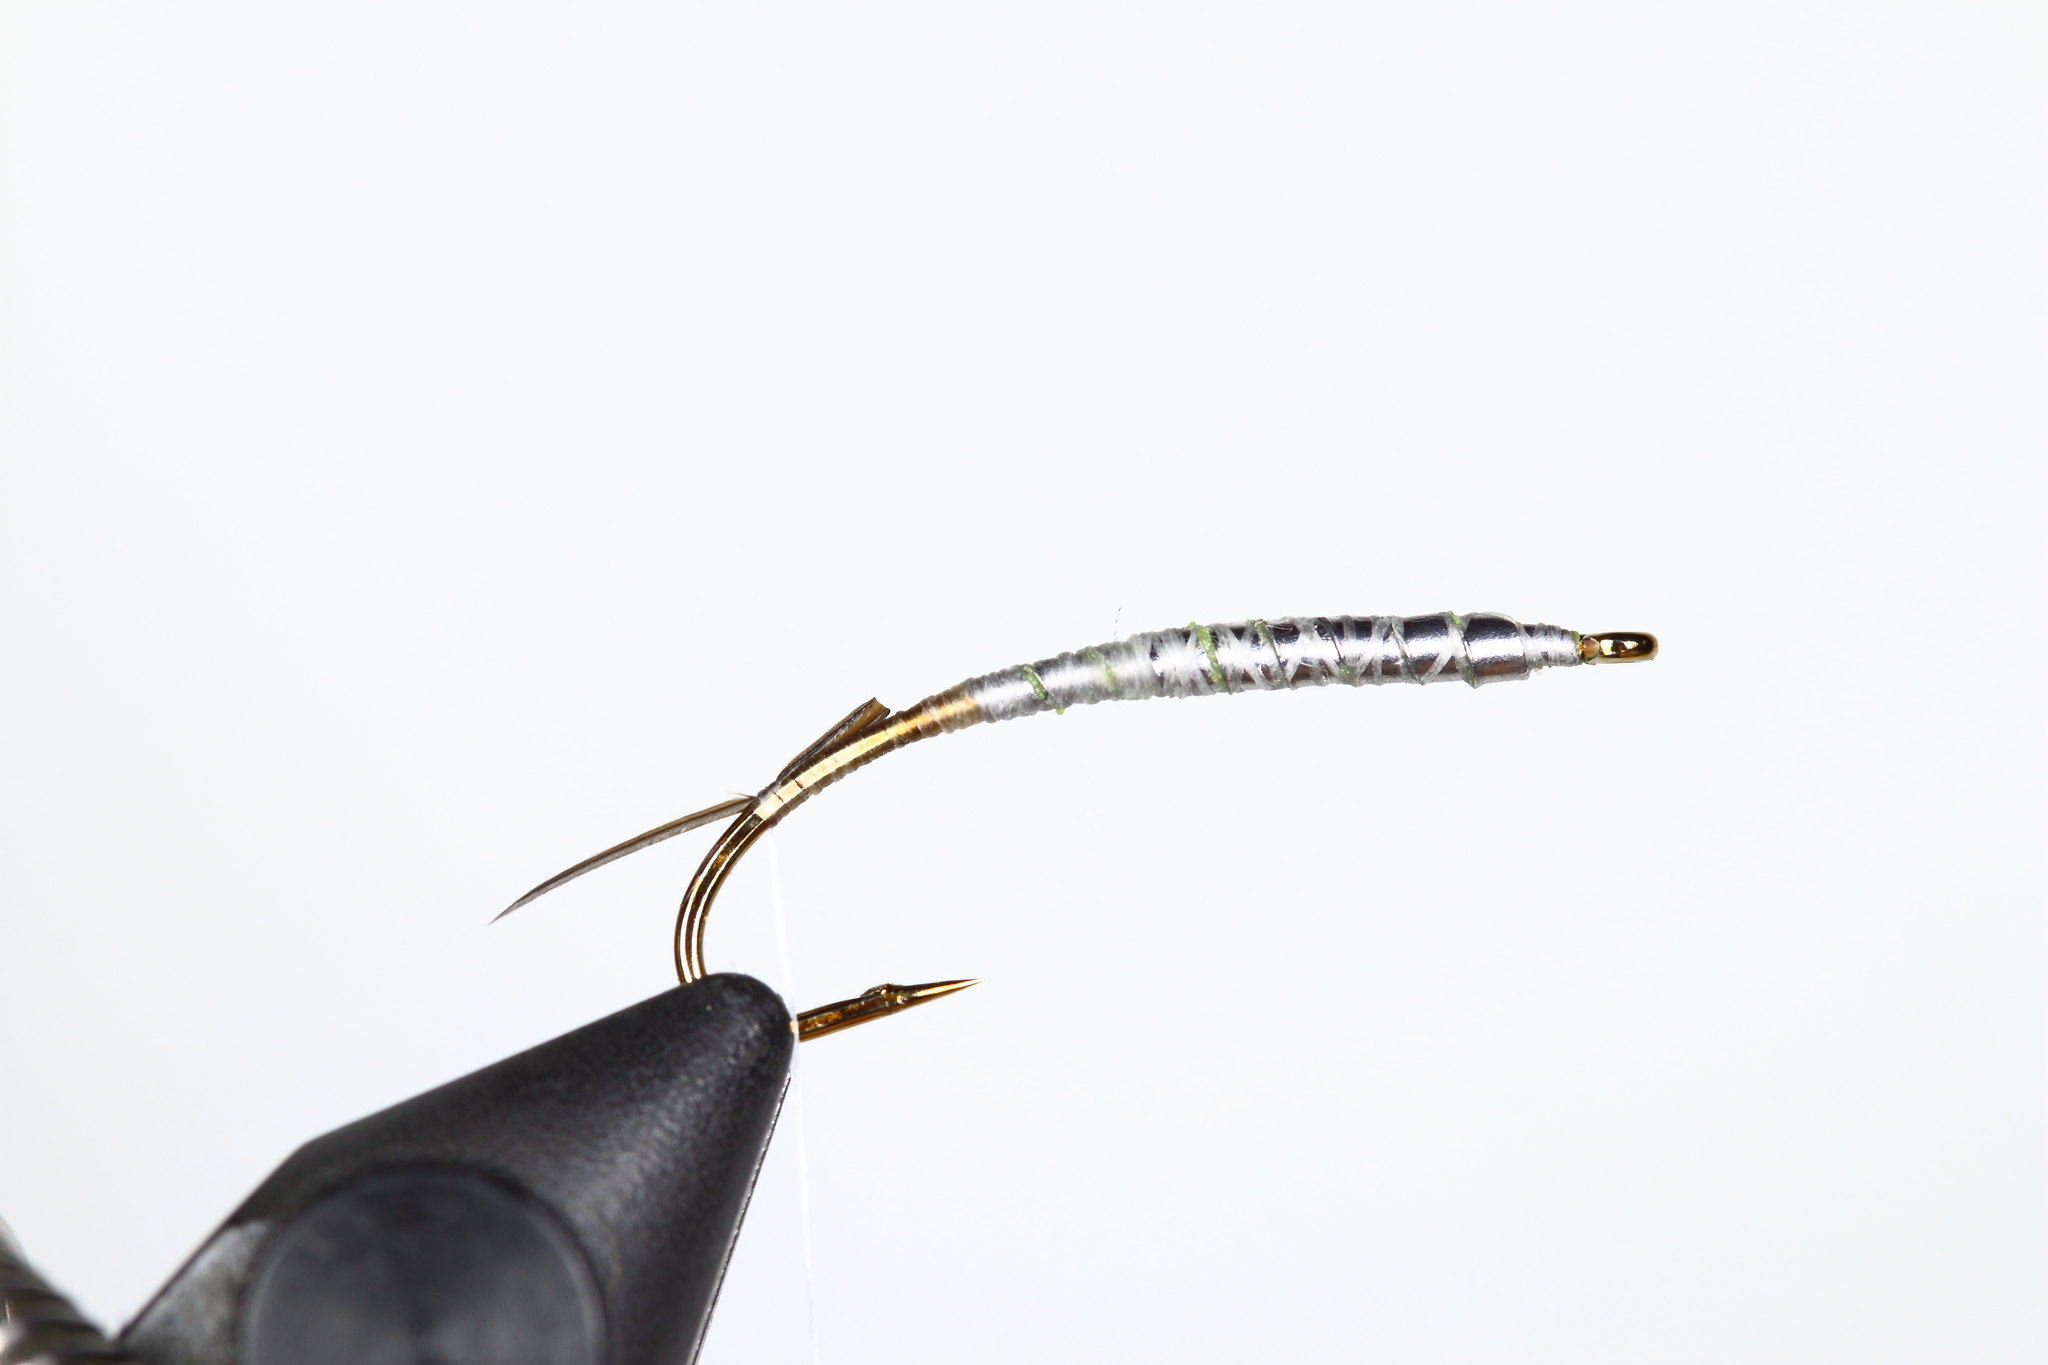
Place your hook in the vice - this is a size 10. Wrap a layer of adhesive lead sheet starting just above the hook point - this will vary depending on hook size, but you are looking for the initial layer to be around 2/3rds the hook shank - wrap to just short of the eye. Start a second layer of lead roughly two turn lead wraps forward and finish just short of the first layer.
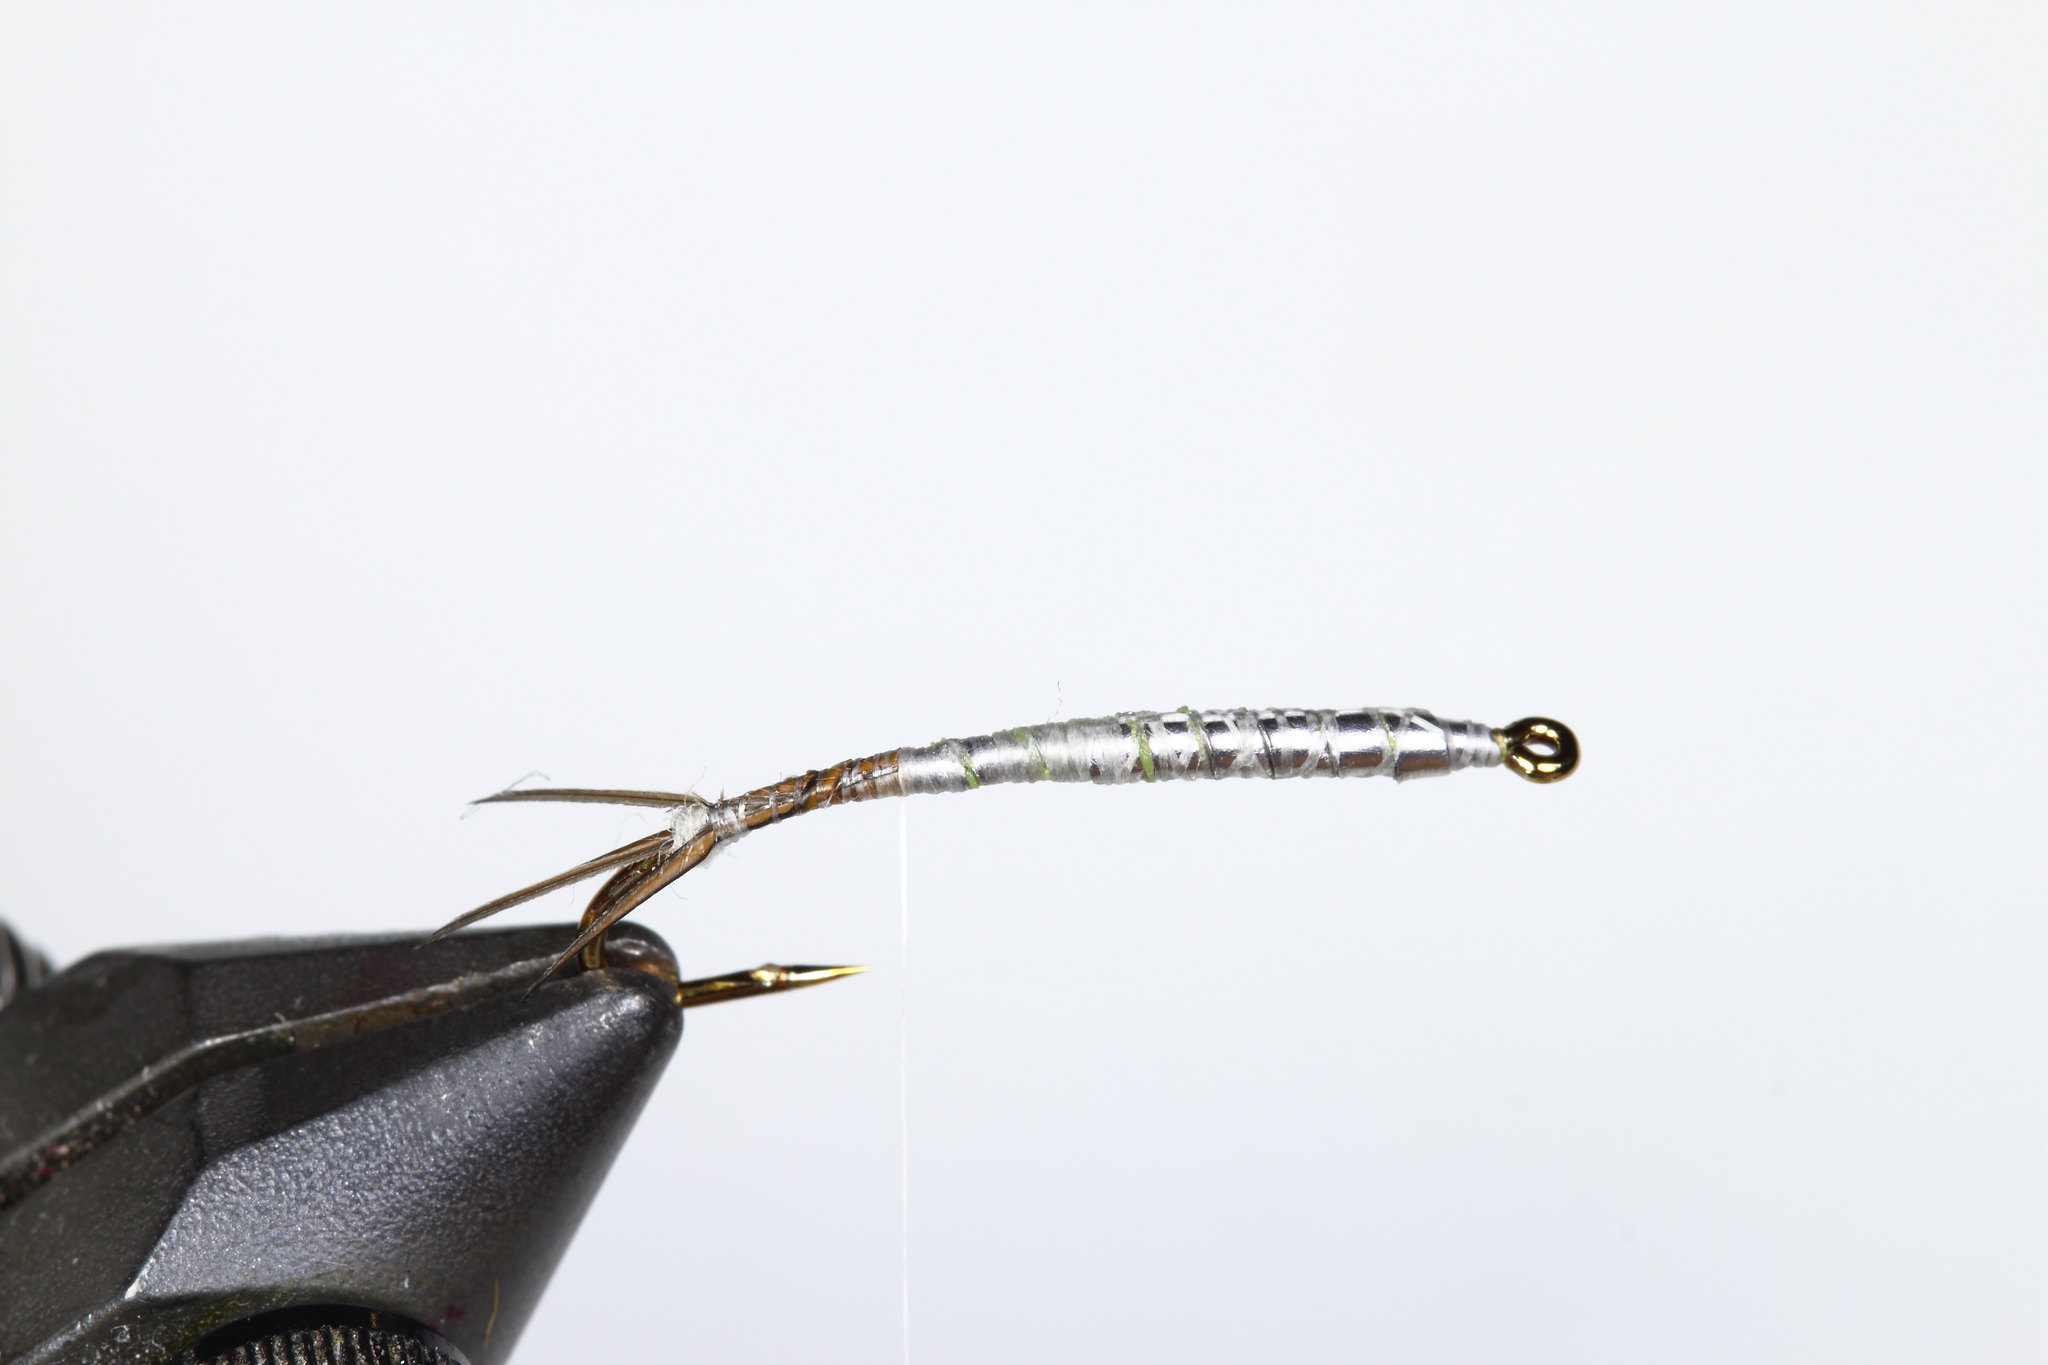
Start your thread at the eye and securely tie down the lead, as you work your way down to the bend smooth out the lead layers so the underbody has a smooth tapered profile. Wrap the thread to a point halfway between the point and where the bend starts. Tie in a single biot on top of the hook. Select your biot from high up the quill where you will find the thinnest biots.
Dub a small amount of dubbing and form a small ball immediately where the first biot is tied in. Next tie in two more biots, one either side of the dubbing ball. Tie these so they are just shorter than the first biot, but running parallel with it.
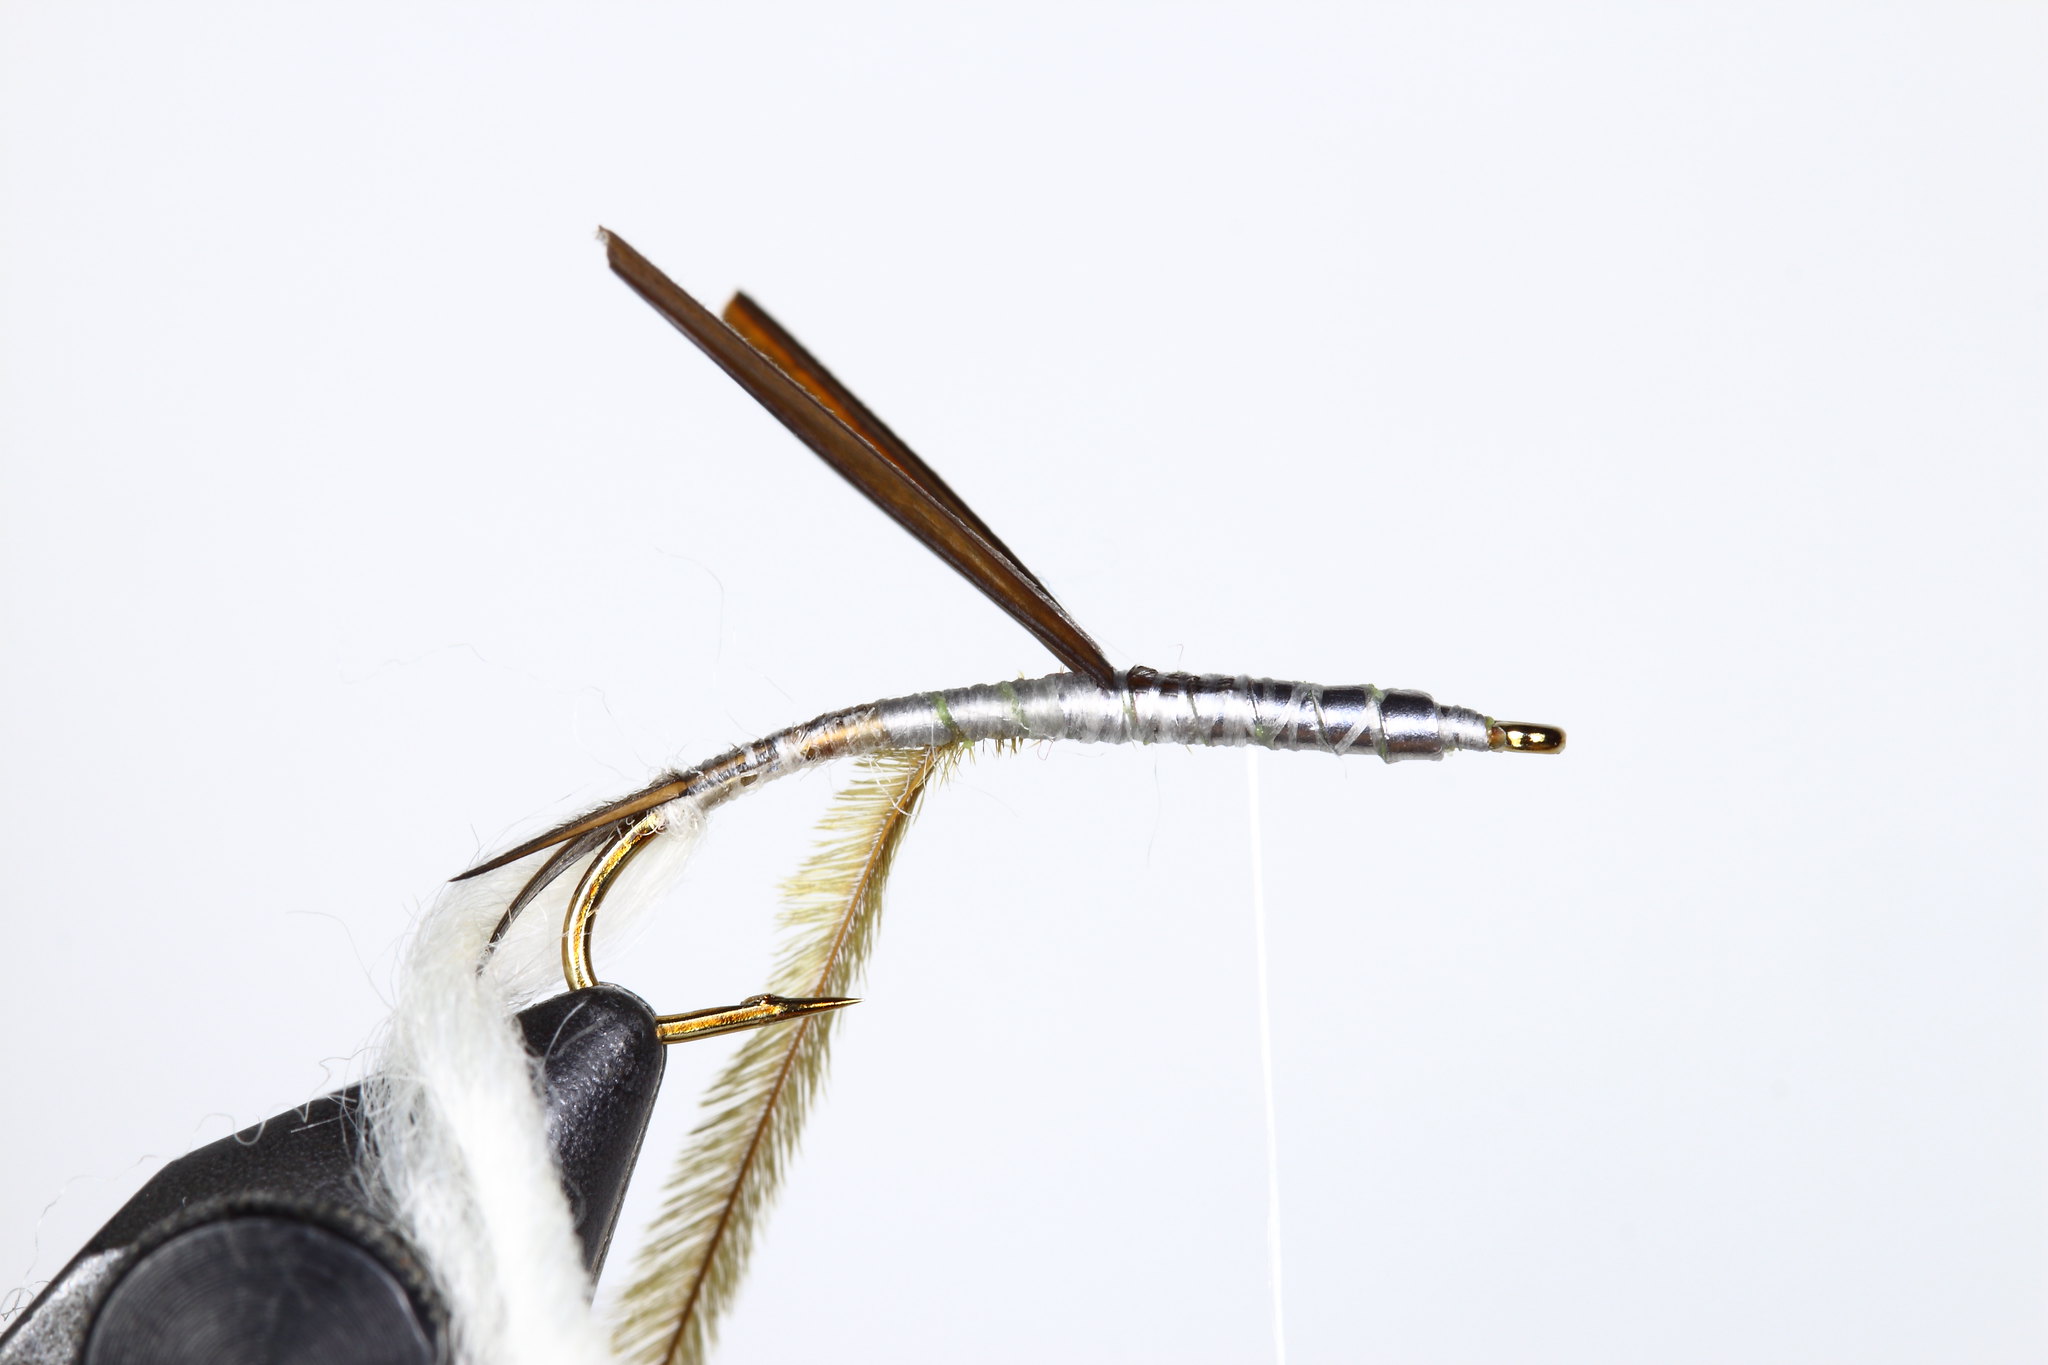
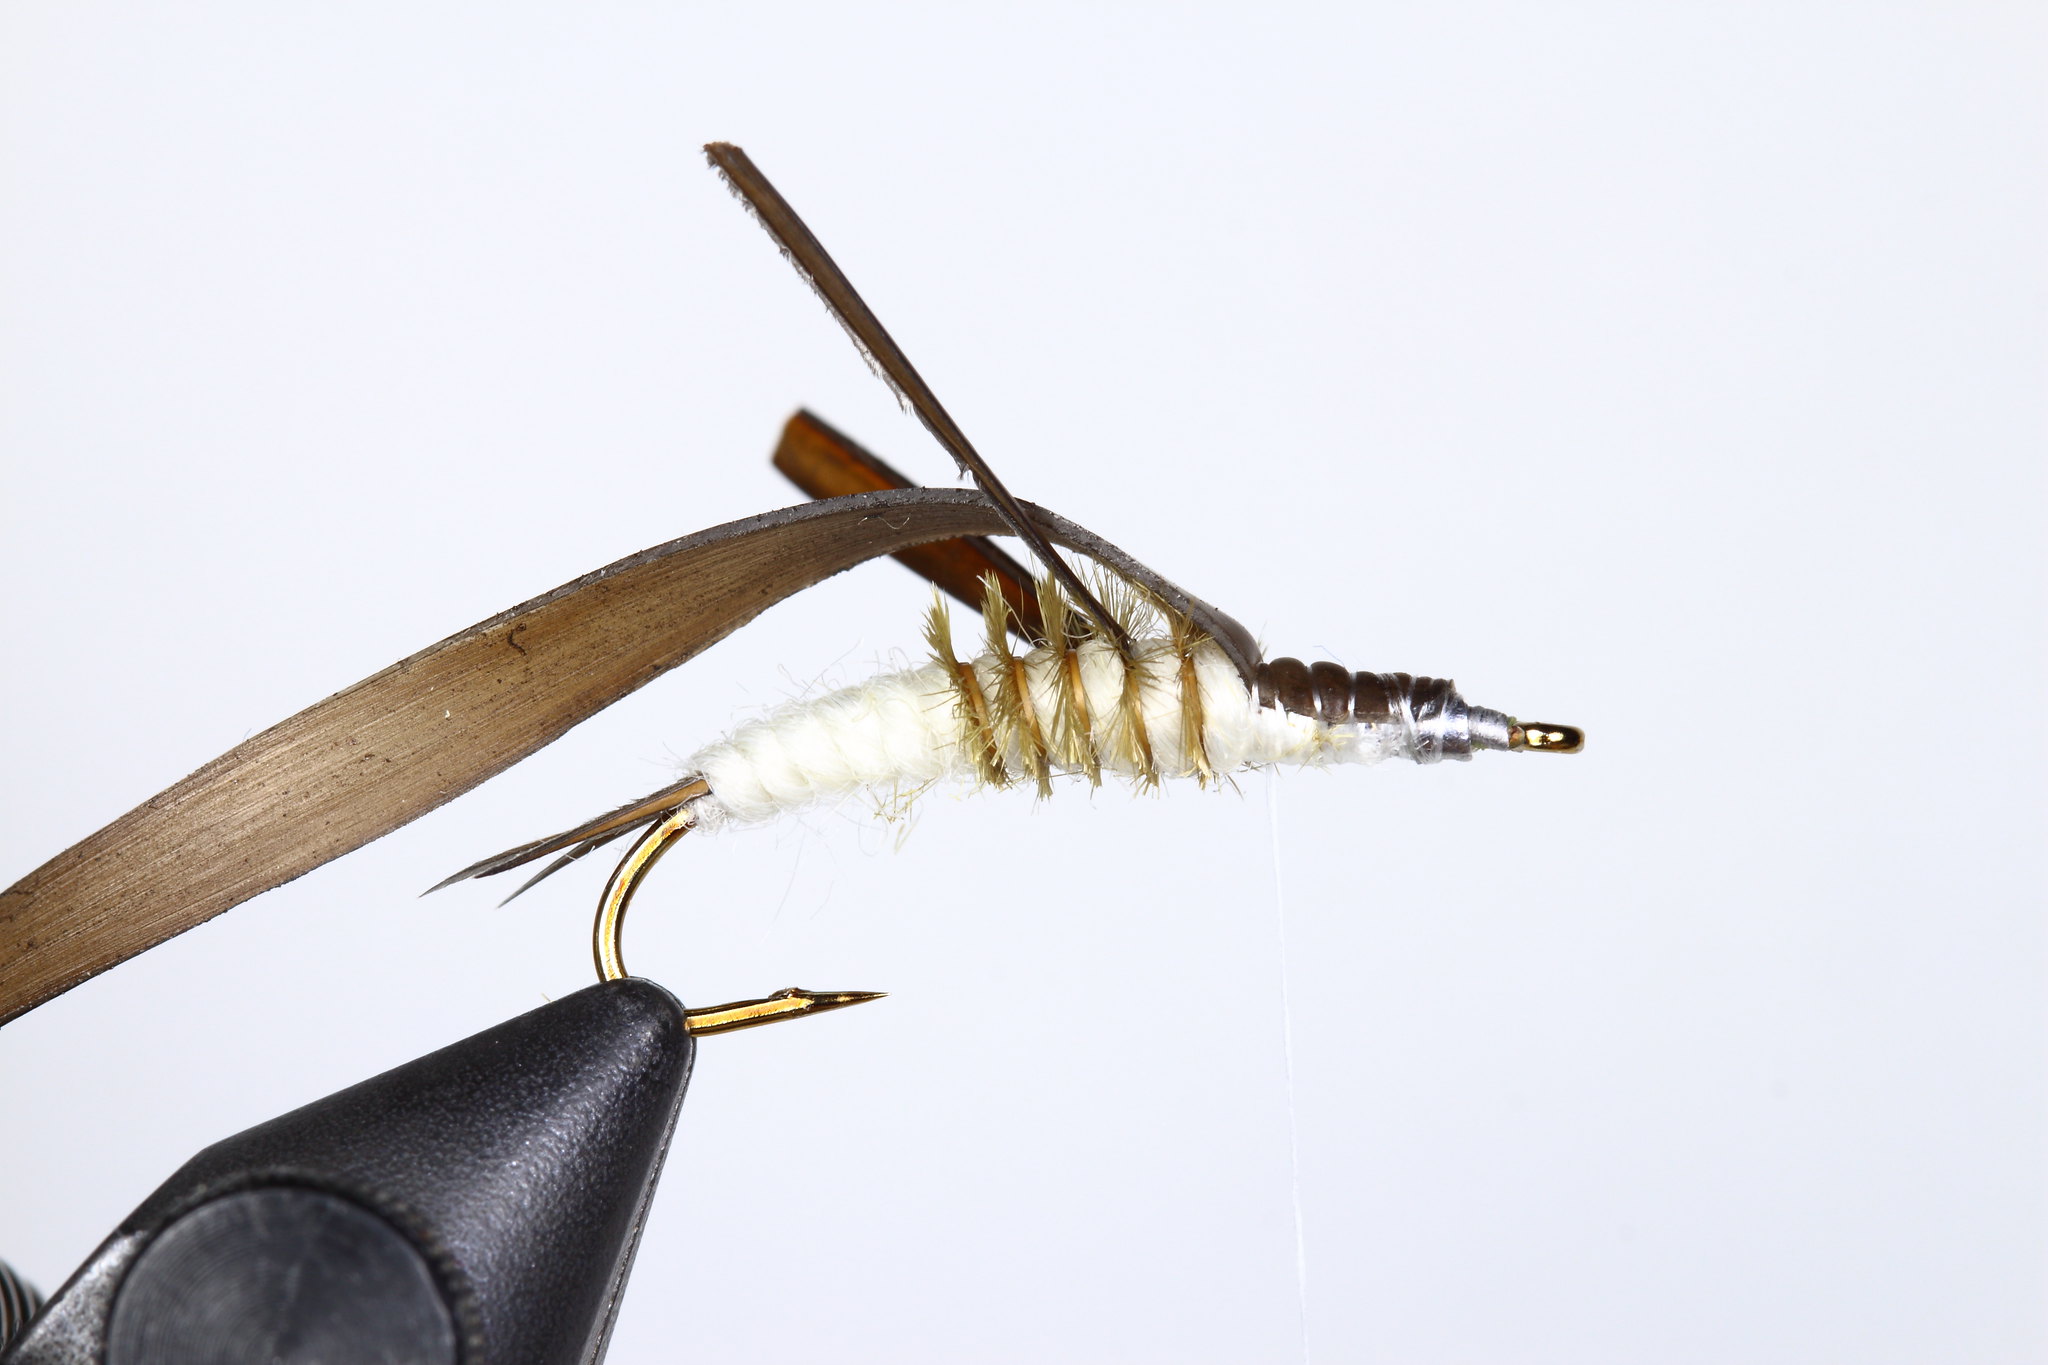
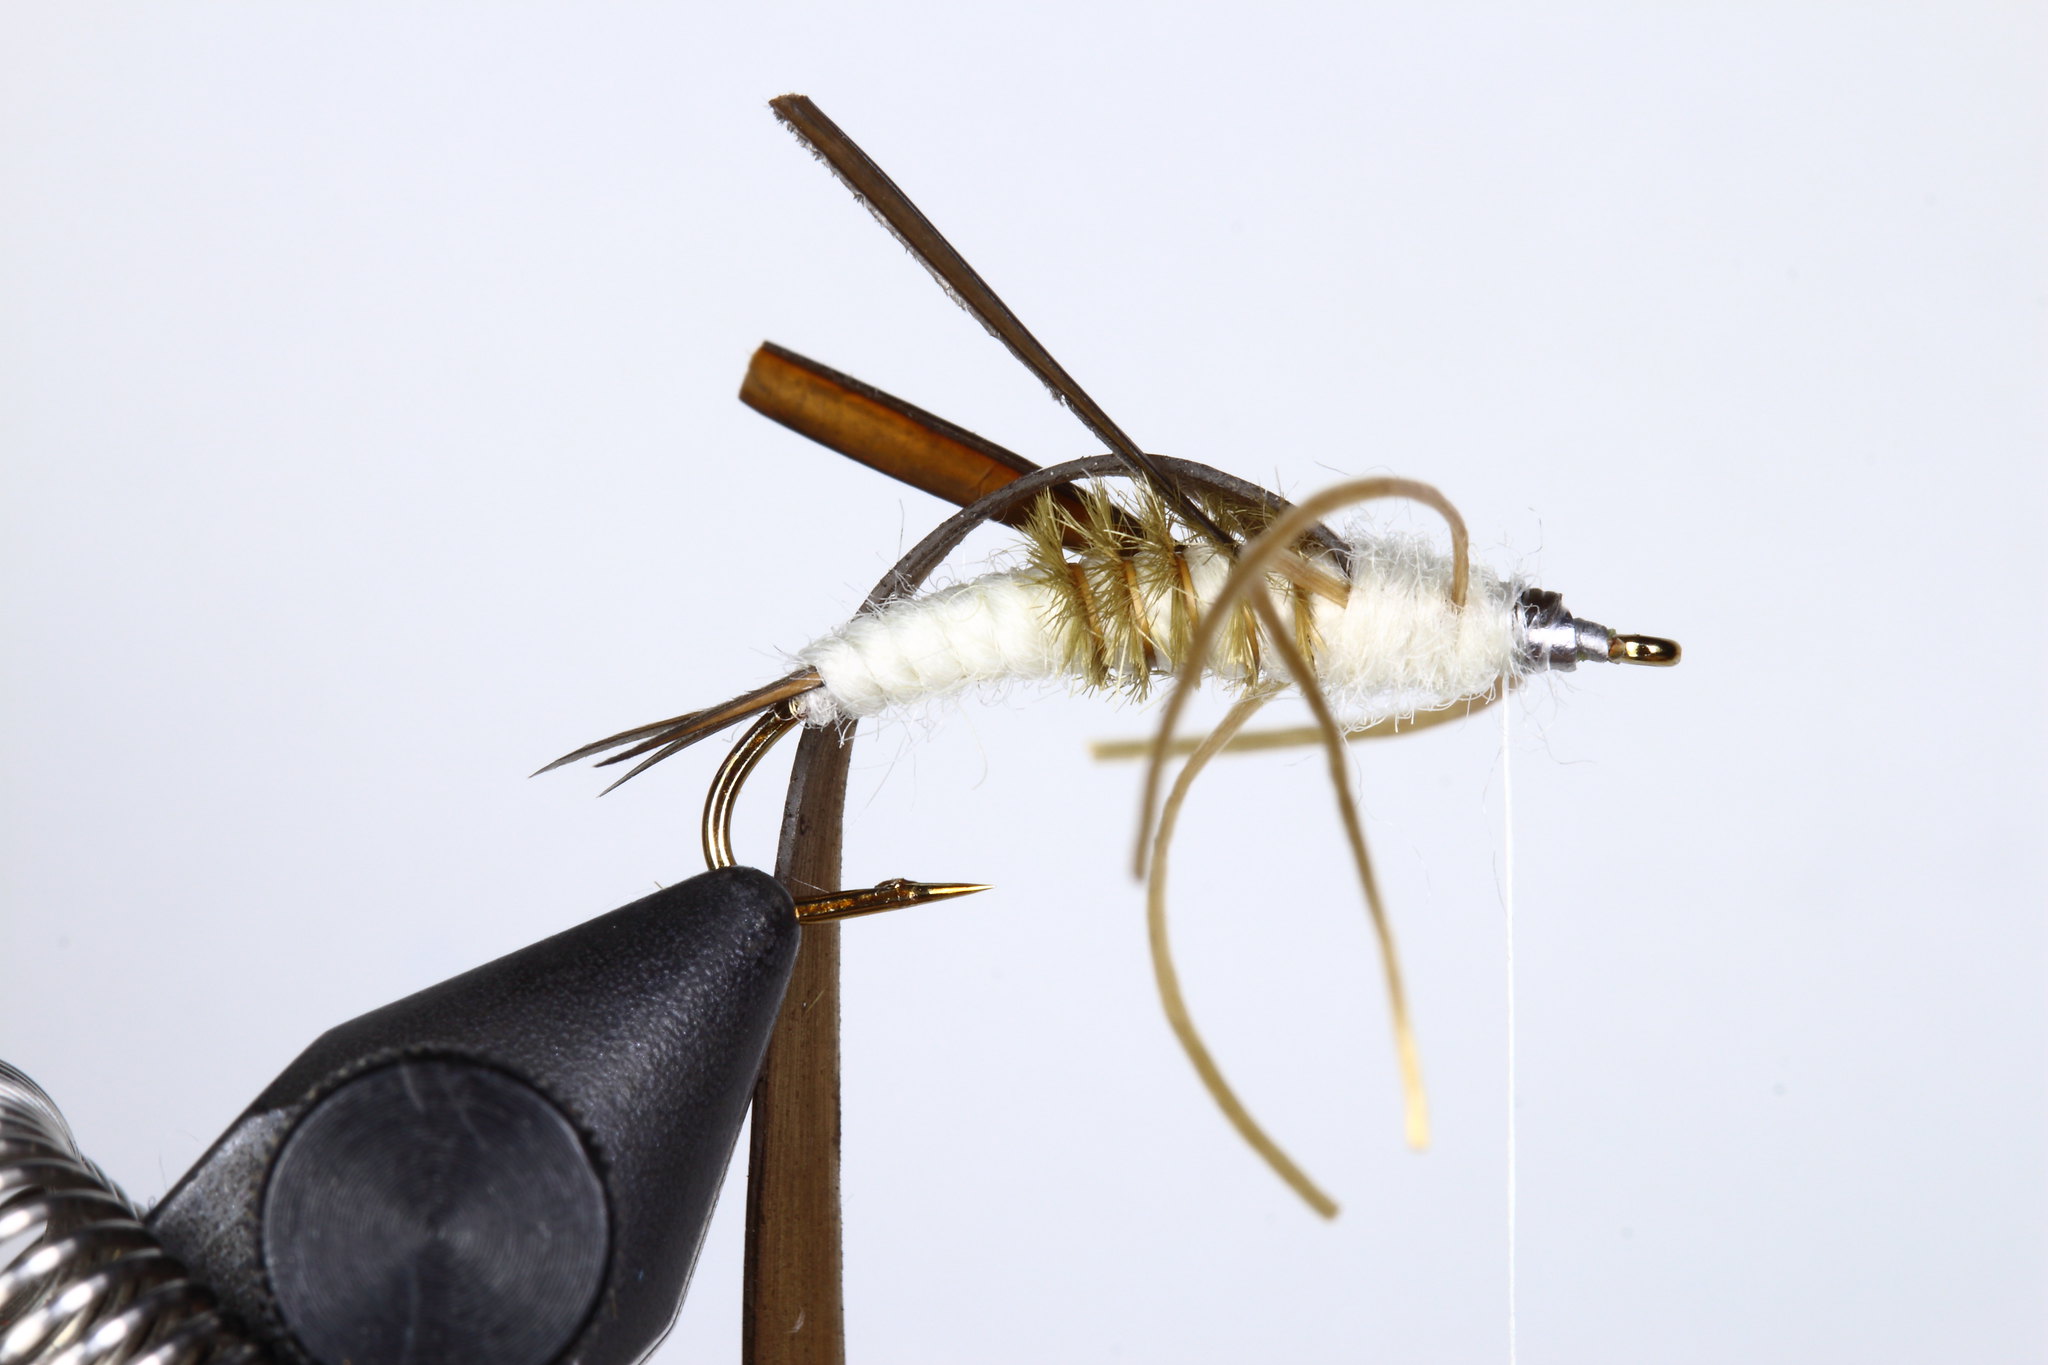
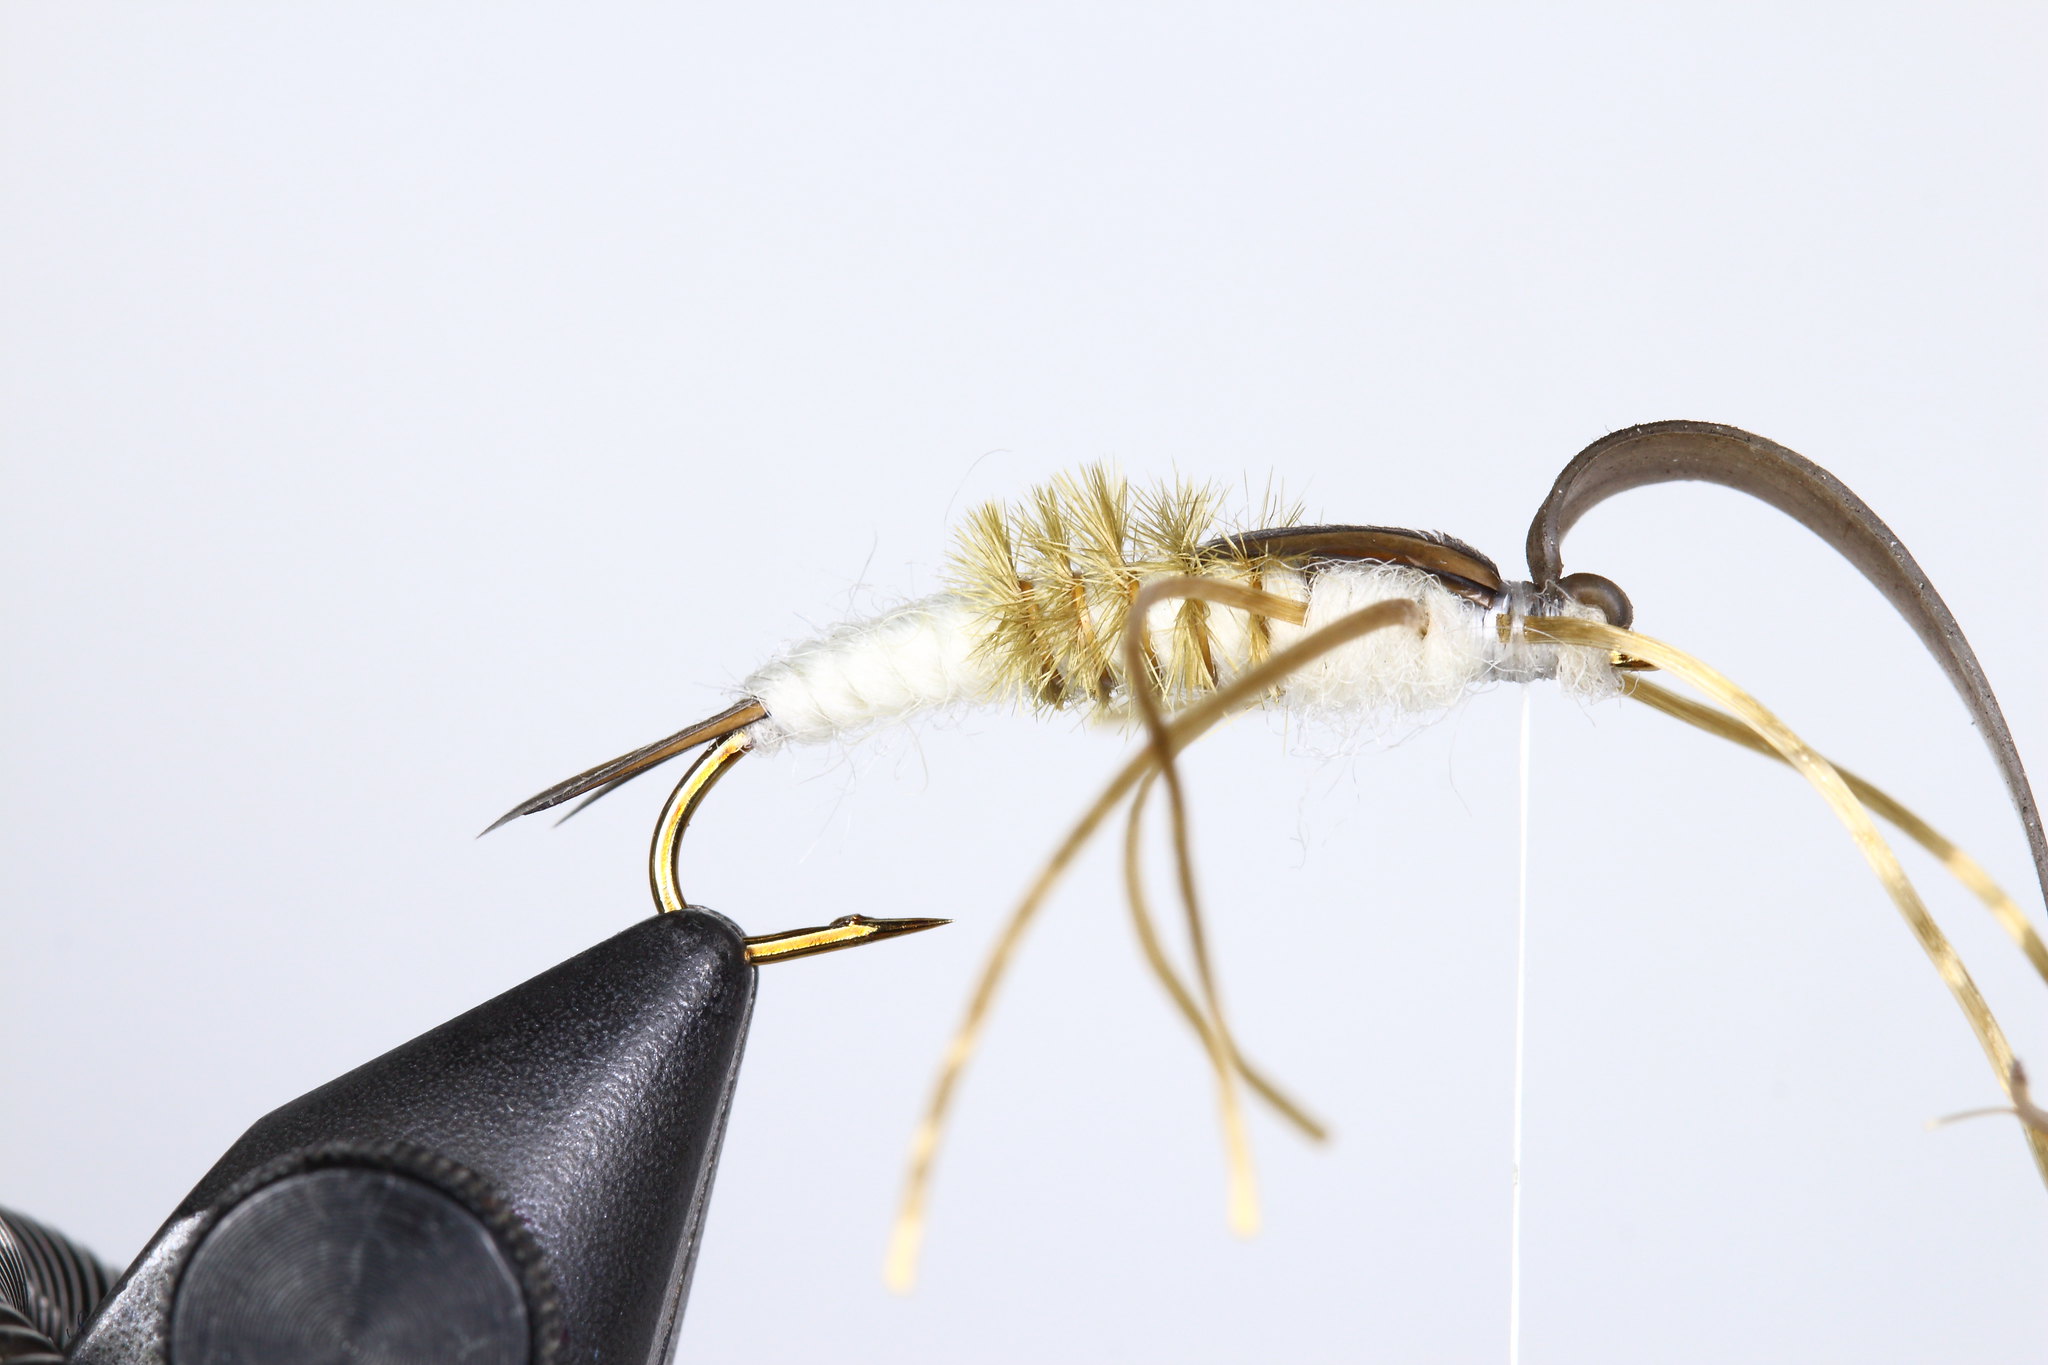
Next prepare a length of wool or yarn. To do this, trim off a piece around three to four inches long; you may need to remove a ply or two depending on the thickness of the wool. Taper the end by shredding the fibres between your finger and thumb, starting at the tip and working along roughly 3/4 of an inch of wool. This will help produce a taper when you wind the wool to make the body. Tie in the wool so that it is tight to the dubbing ball and biots. Then tie in the ostrich herl at the point where the first layer of lead starts, making sure it is tied in nearly underneath so that when the gills are wrapped they start from the side of the fly - this is more for aesthetics than anything, but note that the naturals gills are on top of the abdomen. Then tie in two biots at around the point where the second layer of lead begins. Tie these either side of center so there is a gap in-between them.
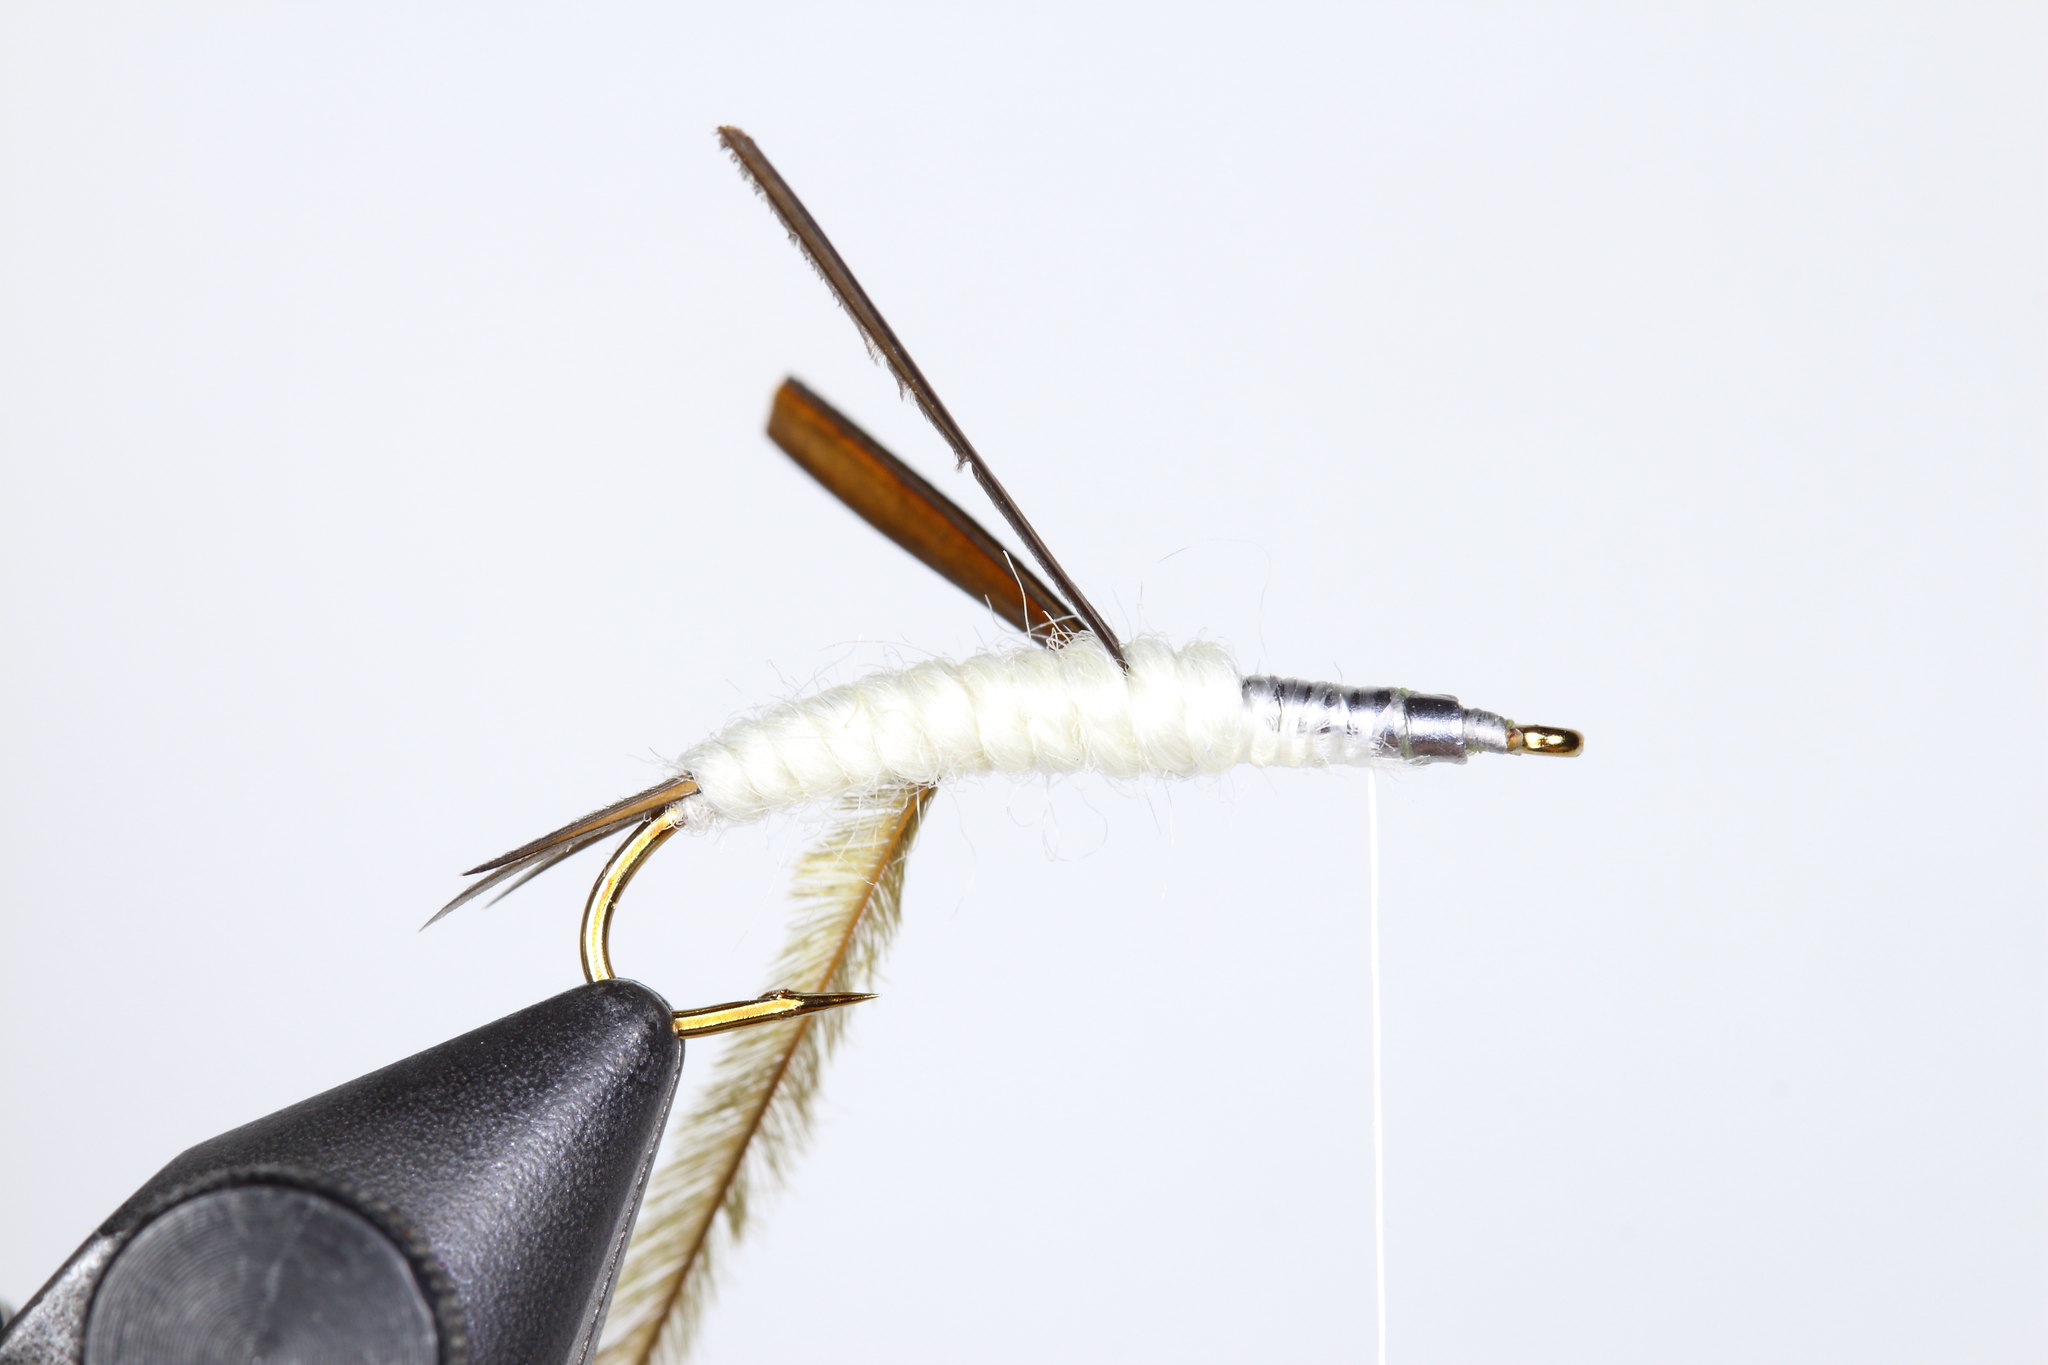
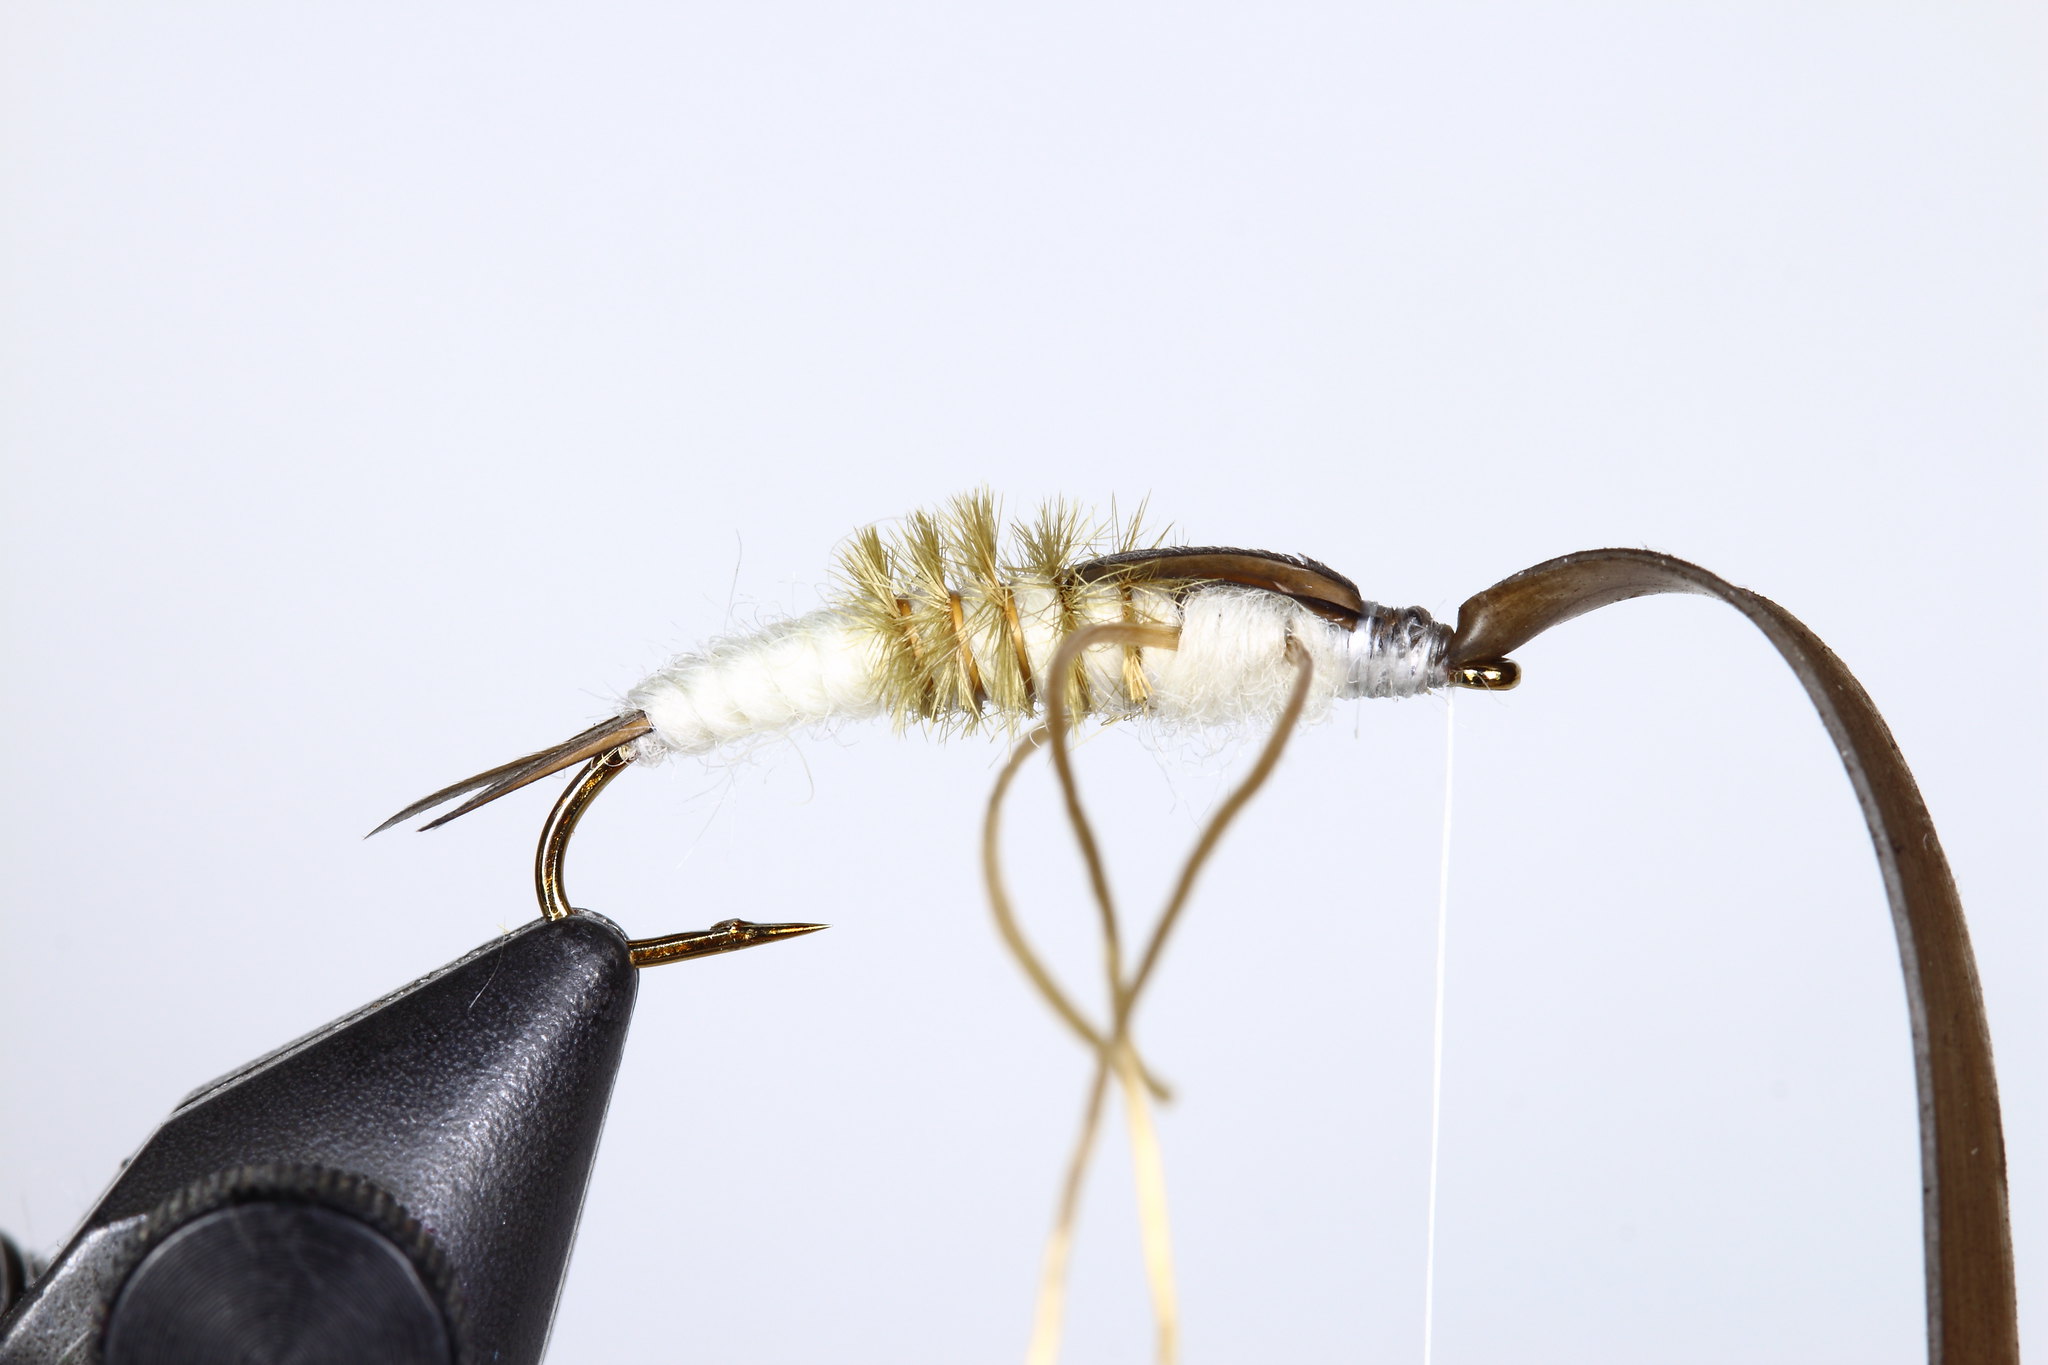
To make the body, twist the wool the direction it is already twisted to tighten it, this will give you a segmentation effect and wind the wool up the hook shank, keeping the twist tight as you wrap. When you reach the ostrich ensure that it remains in place in-between the segments and continue to one or two segments past the biots, again ensuring they remain in place.
To note, if you are wrapping the wool from back to front - opposite to the thread wraps - it will help immensely to tie the wool in the end where it has been cut from the ball. This way you will be twisting with the wool and the twist will remain as you wrap it around the hook shank, rather than the twist loosening as it would if you tied in the opposite end.
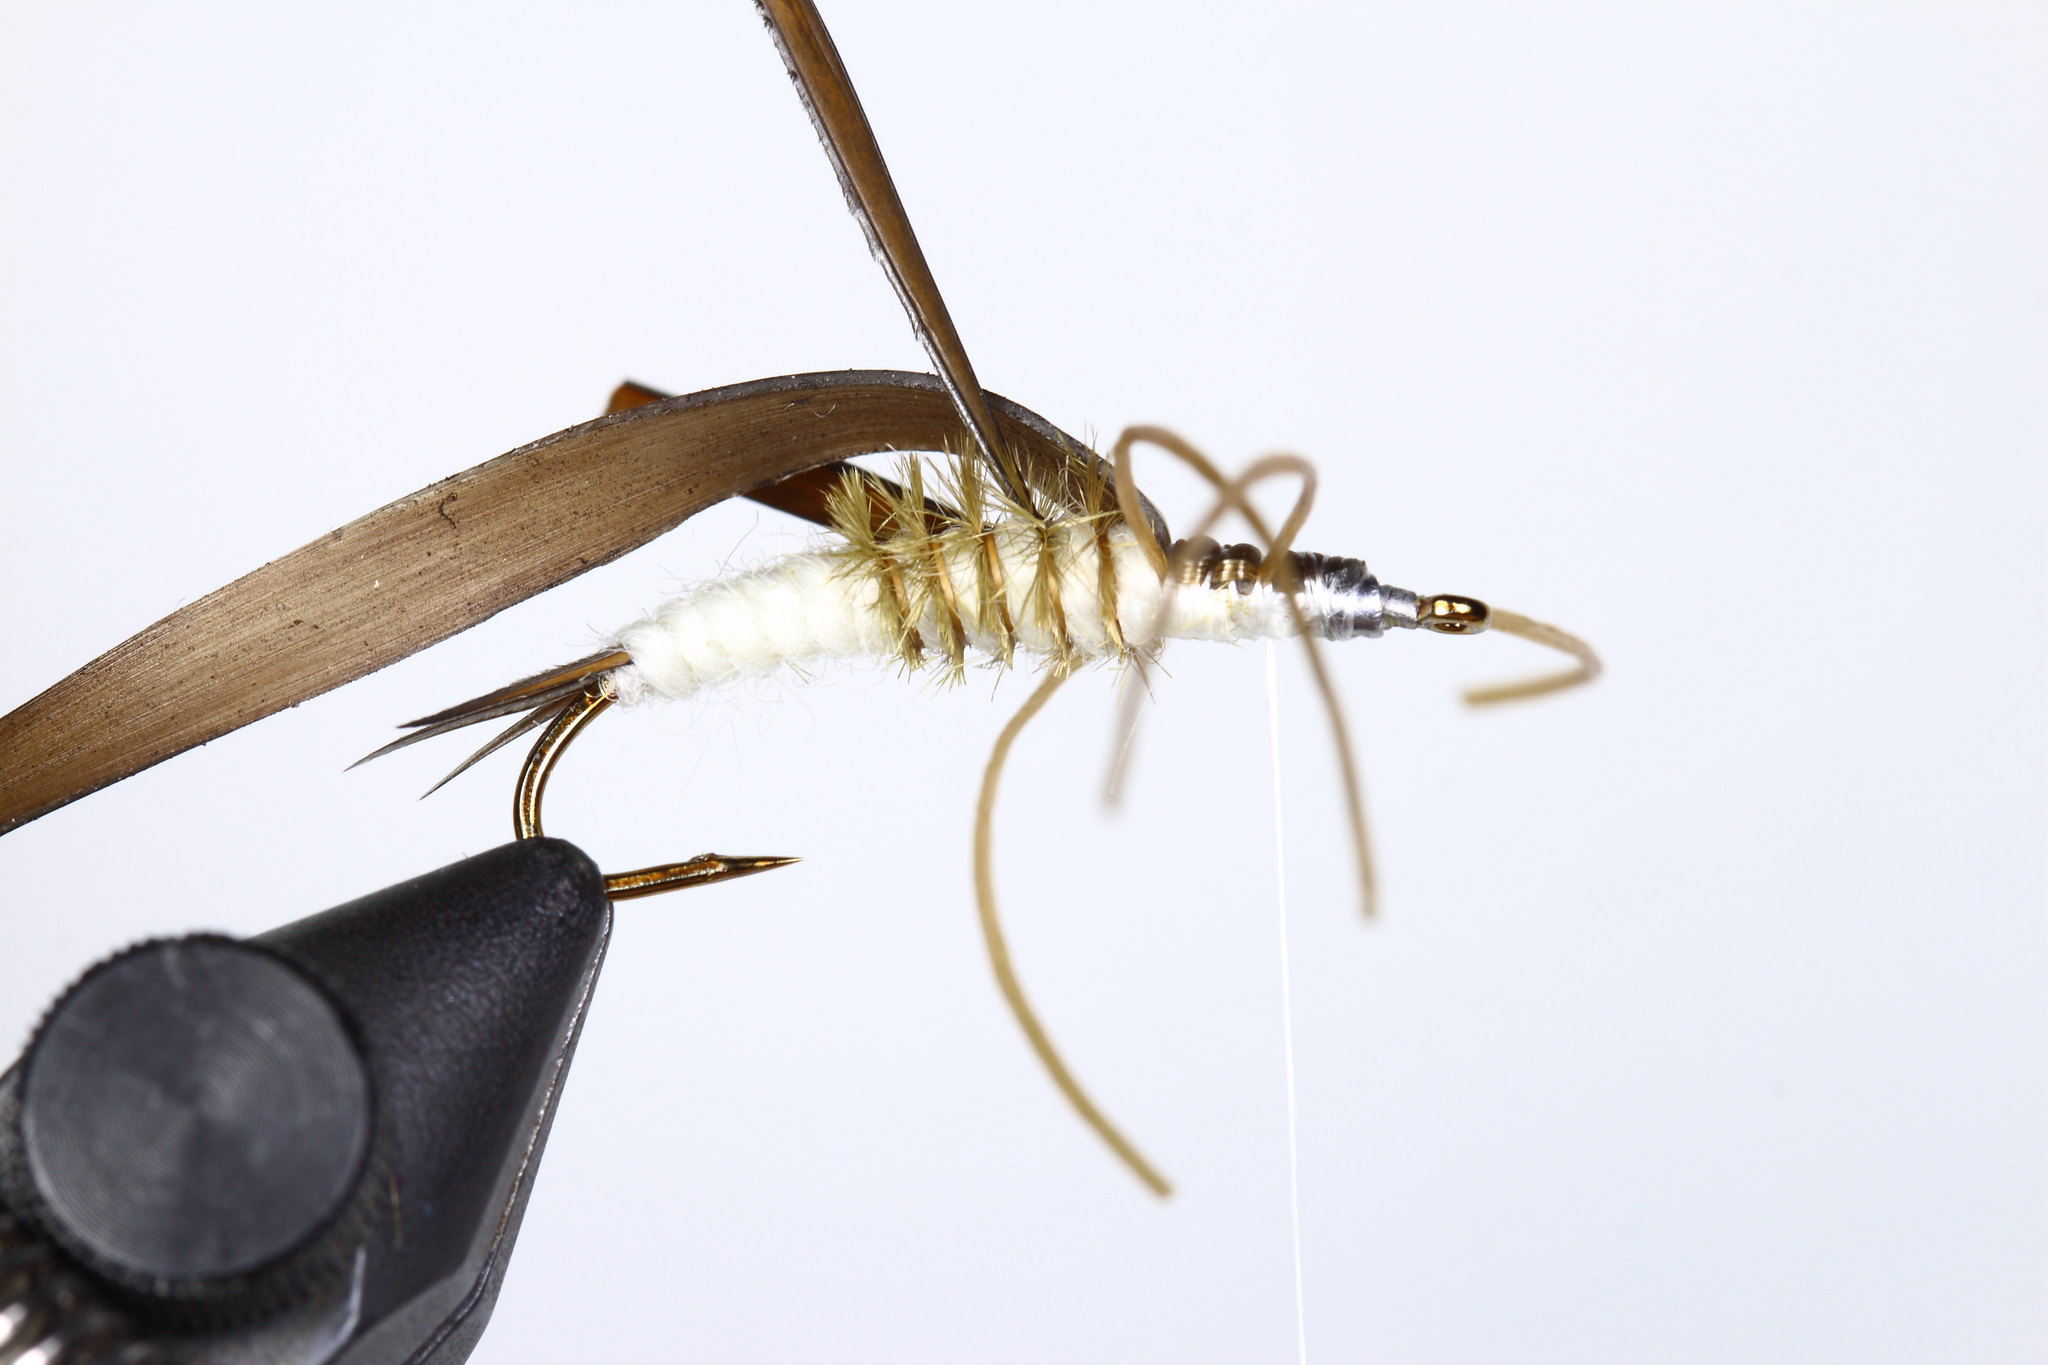
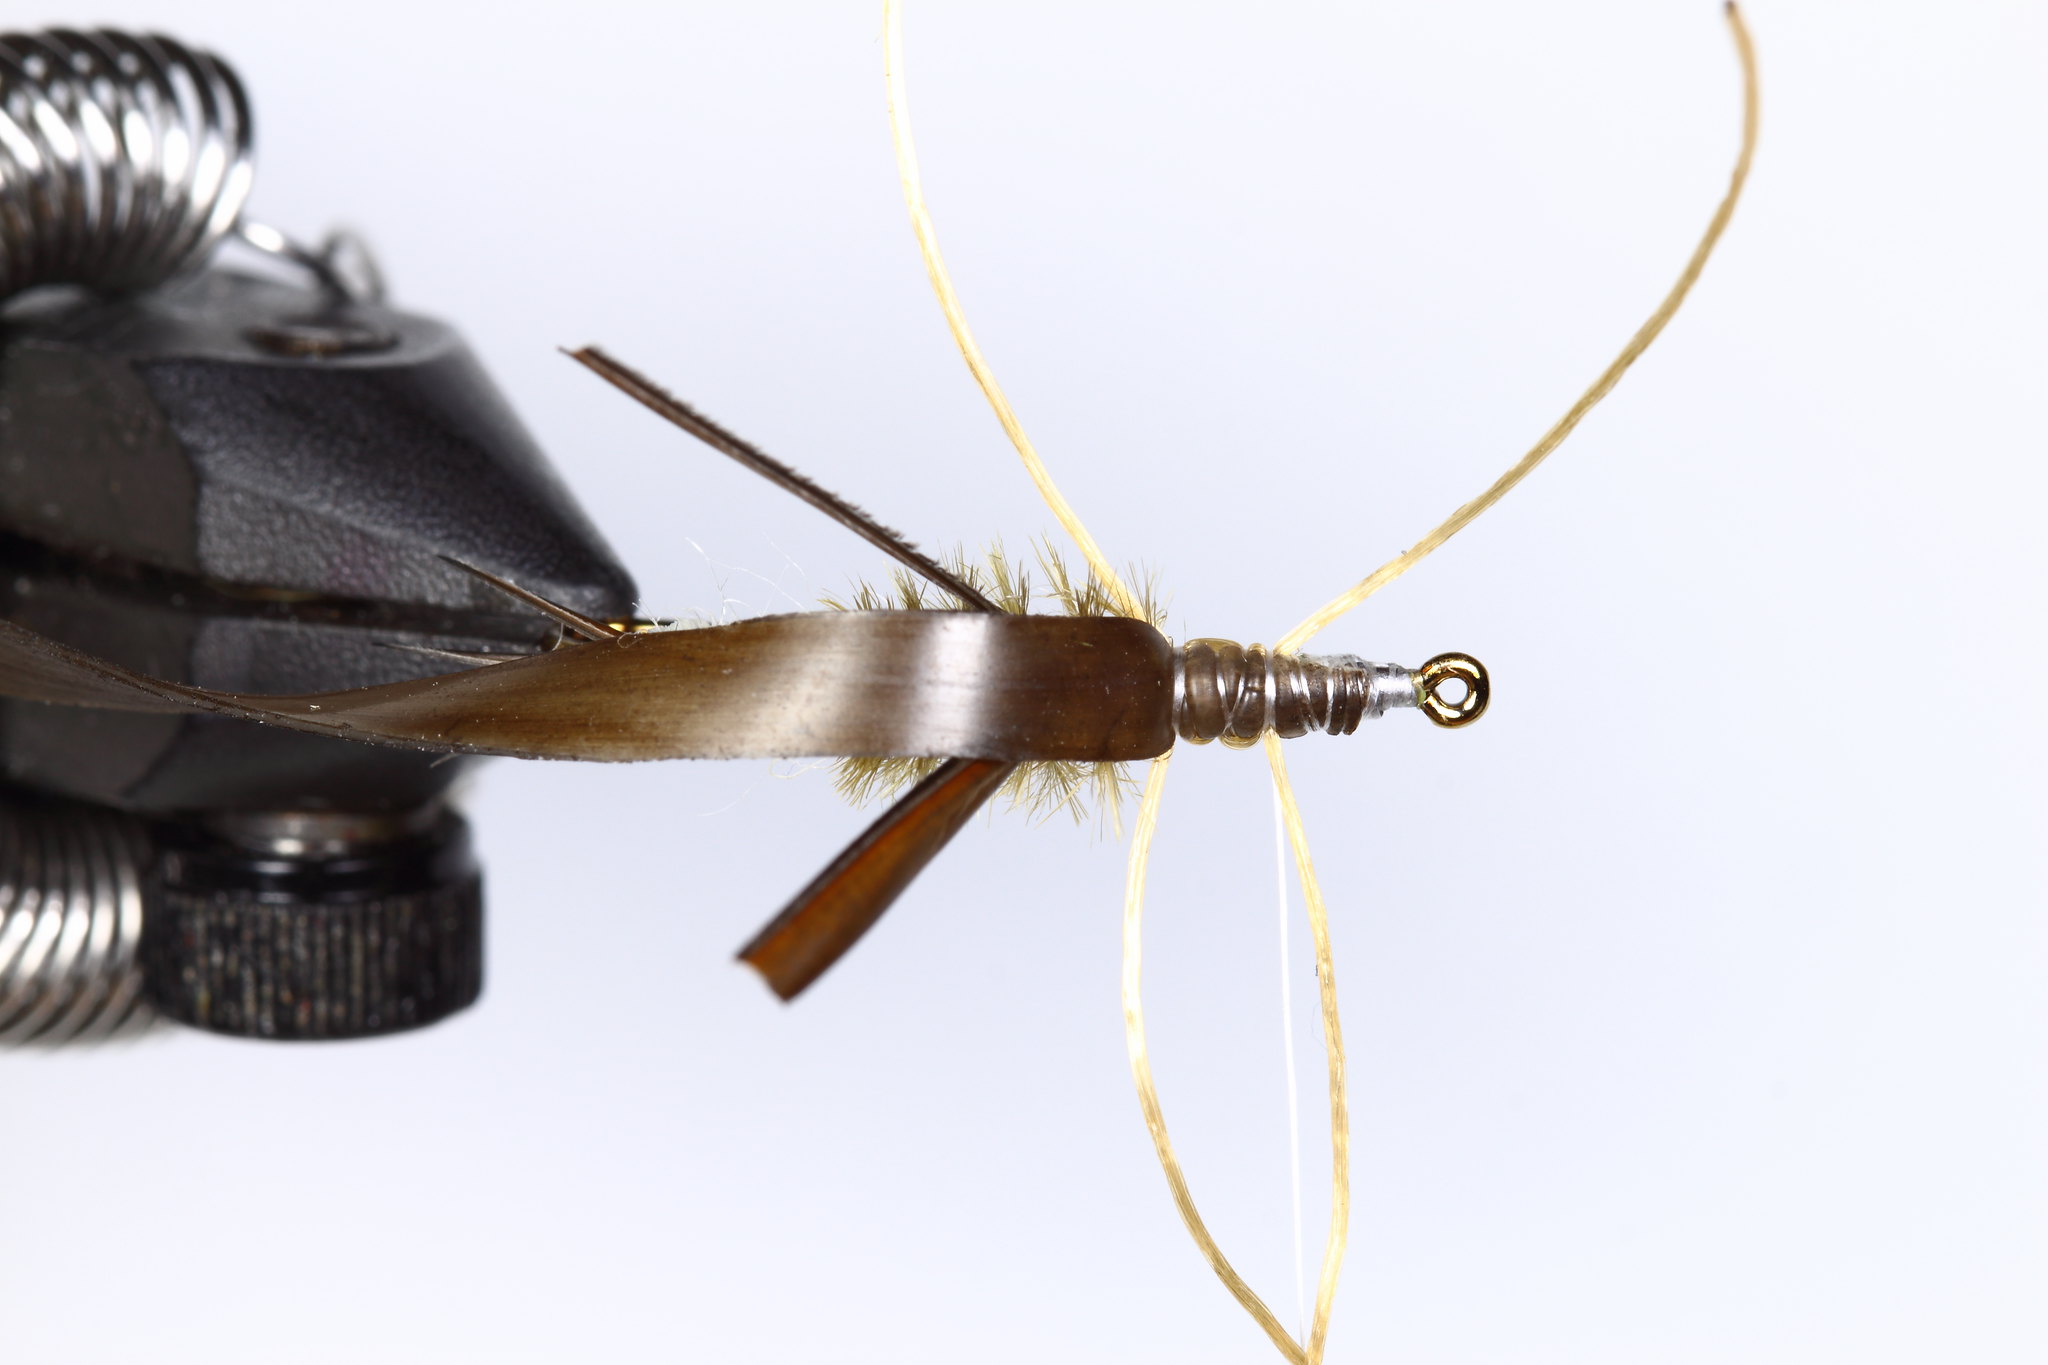
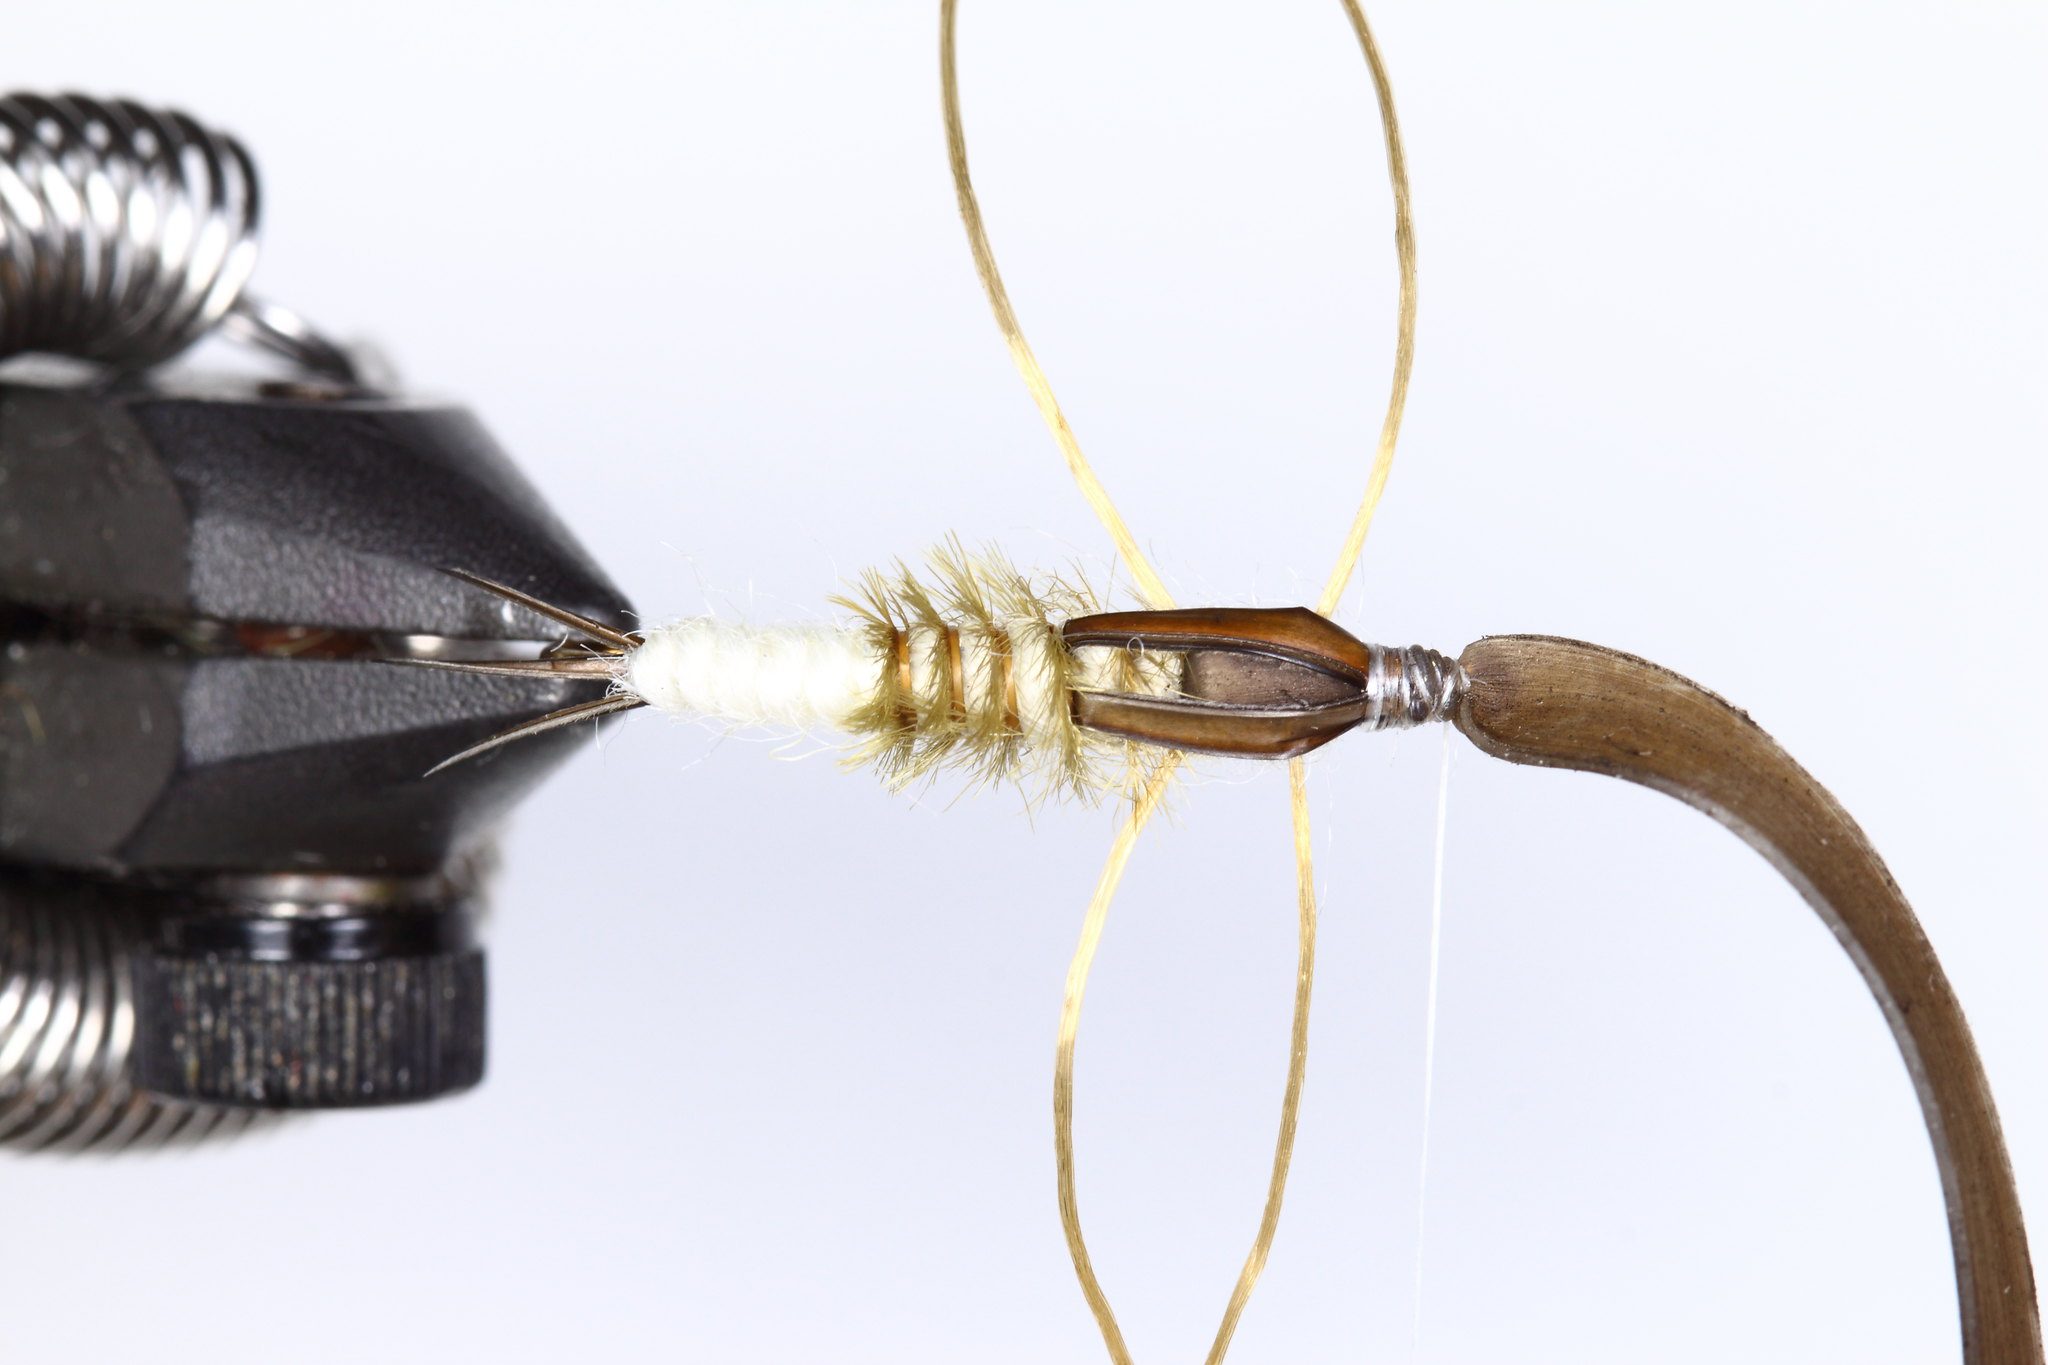
Next make the gills by winding the ostrich herl following the direction of the wool body and tie off; trim the gills underneath either now or when the fly is finished. Then tie in a length of Virtual Nymph Nymph Skin on top of the shank, tying in tight to the last segment of the body. Tie in shiny side up and it will help to pre-colour both sides of the Nymph Skin with a marker prior to tying in.
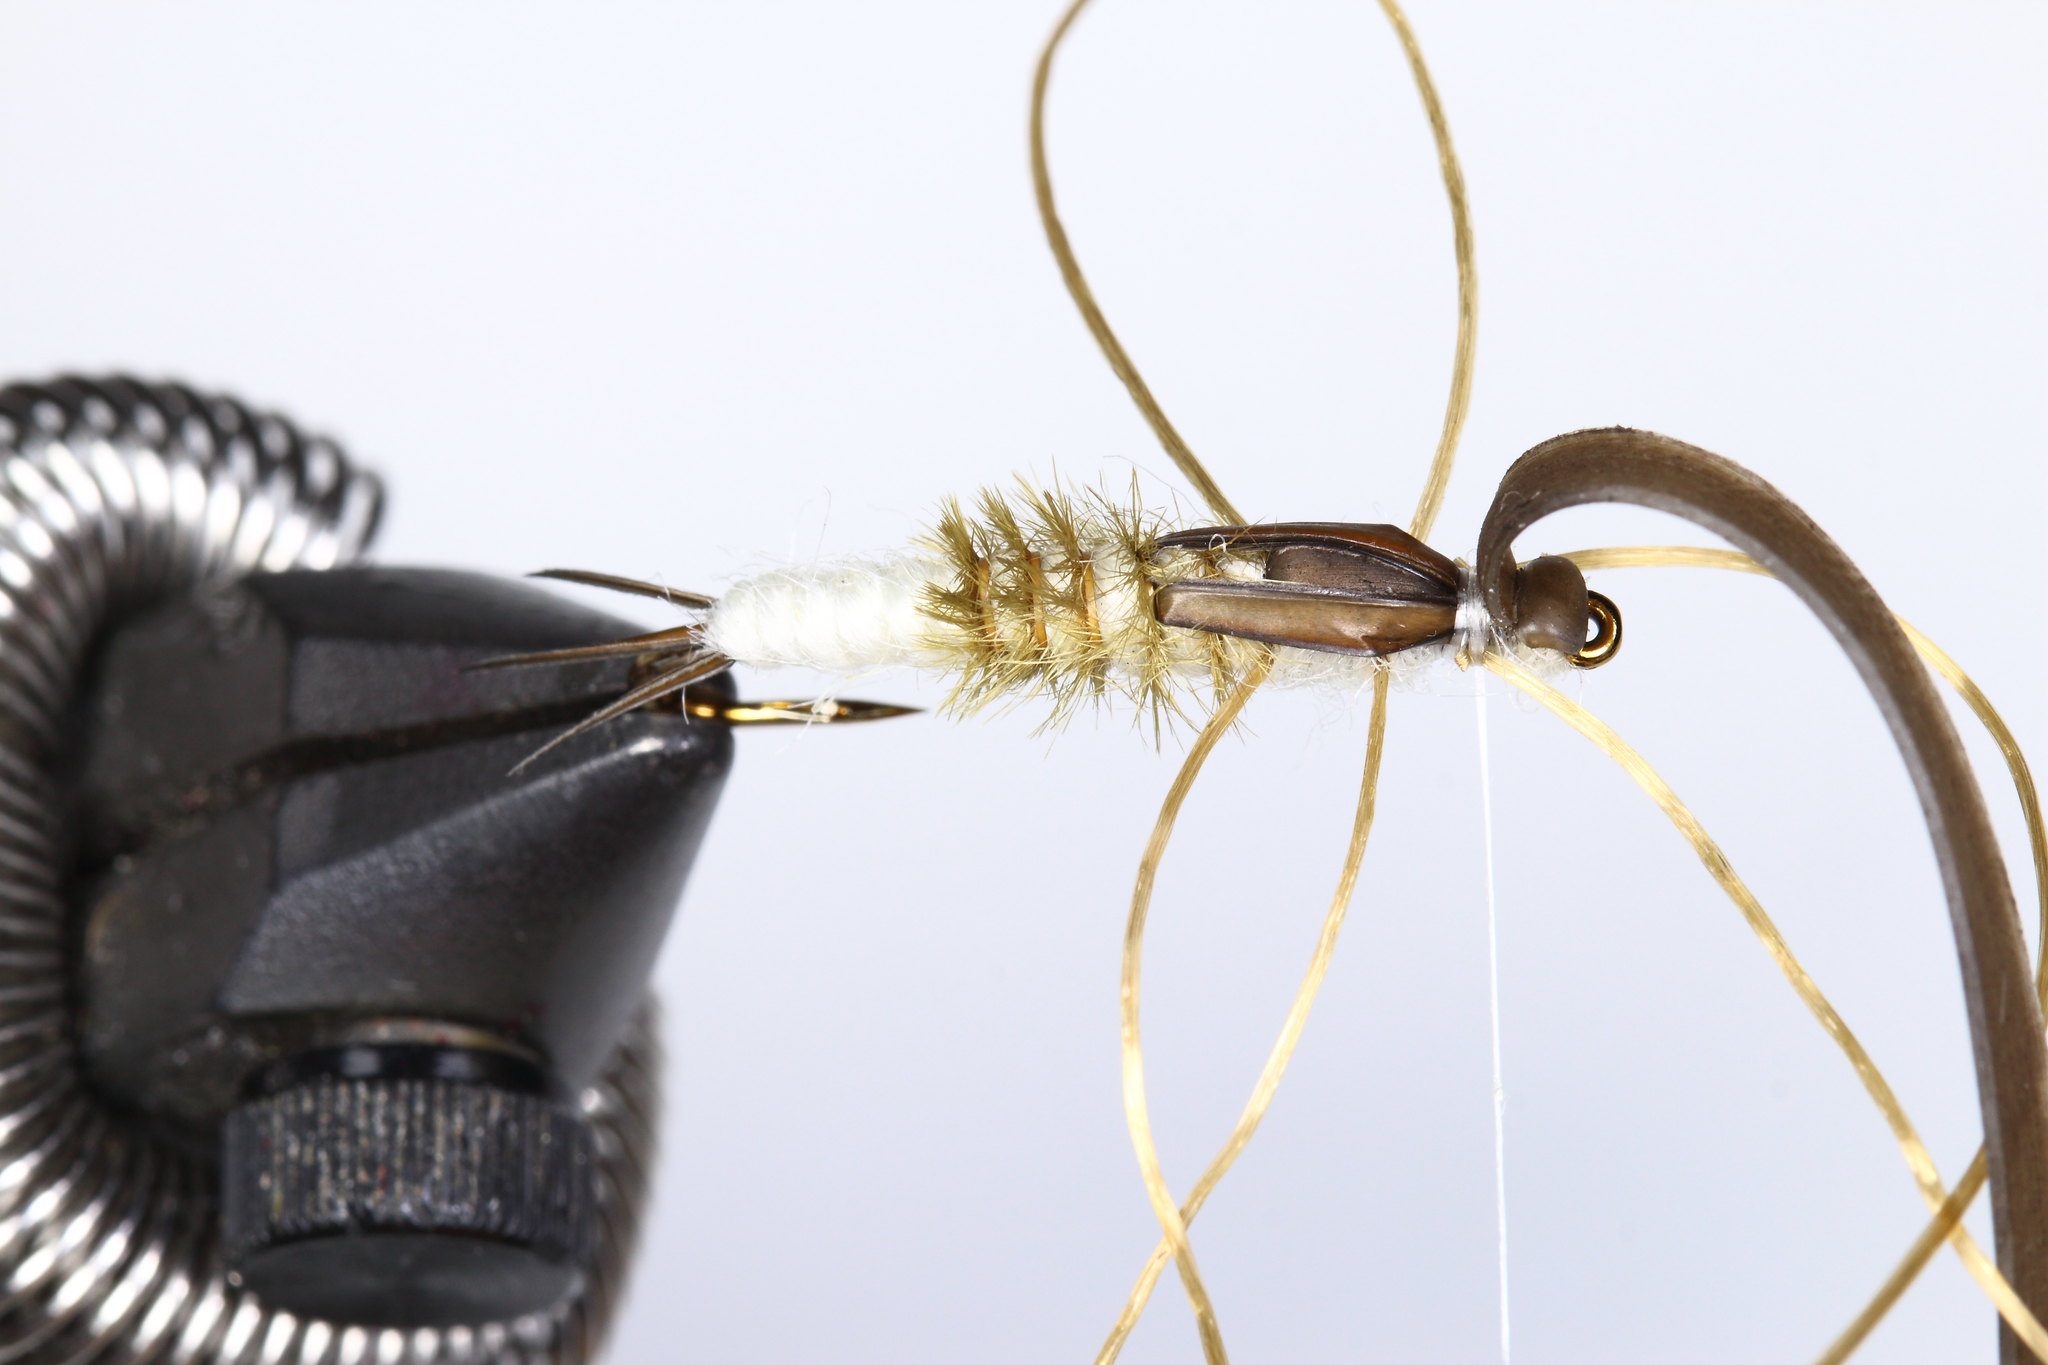
Tie in two lengths of Flexifloss for the legs, one either side of the hook shank. The back set of legs should be tied in against the last segment, this will help to push the leg out away from the thorax. Wind the thread forward trapping the Flexifloss; these will form the middle set of legs. The middle set of legs should be fixed in a position around halfway between where the thorax starts and the eye of the hook.
Dub a noodle of dubbing onto the thread. I used the wool that formed the body to make the dubbing by chopping and shredding to mix up the fibres in to usable dubbing. Wind the dubbing, filling the gap between the legs and finishing approximately one wrap in front of the middle legs; use the dubbing to help position the legs, the back legs should point back slightly, the middle legs should roughly be 90 degrees to the hook shank.
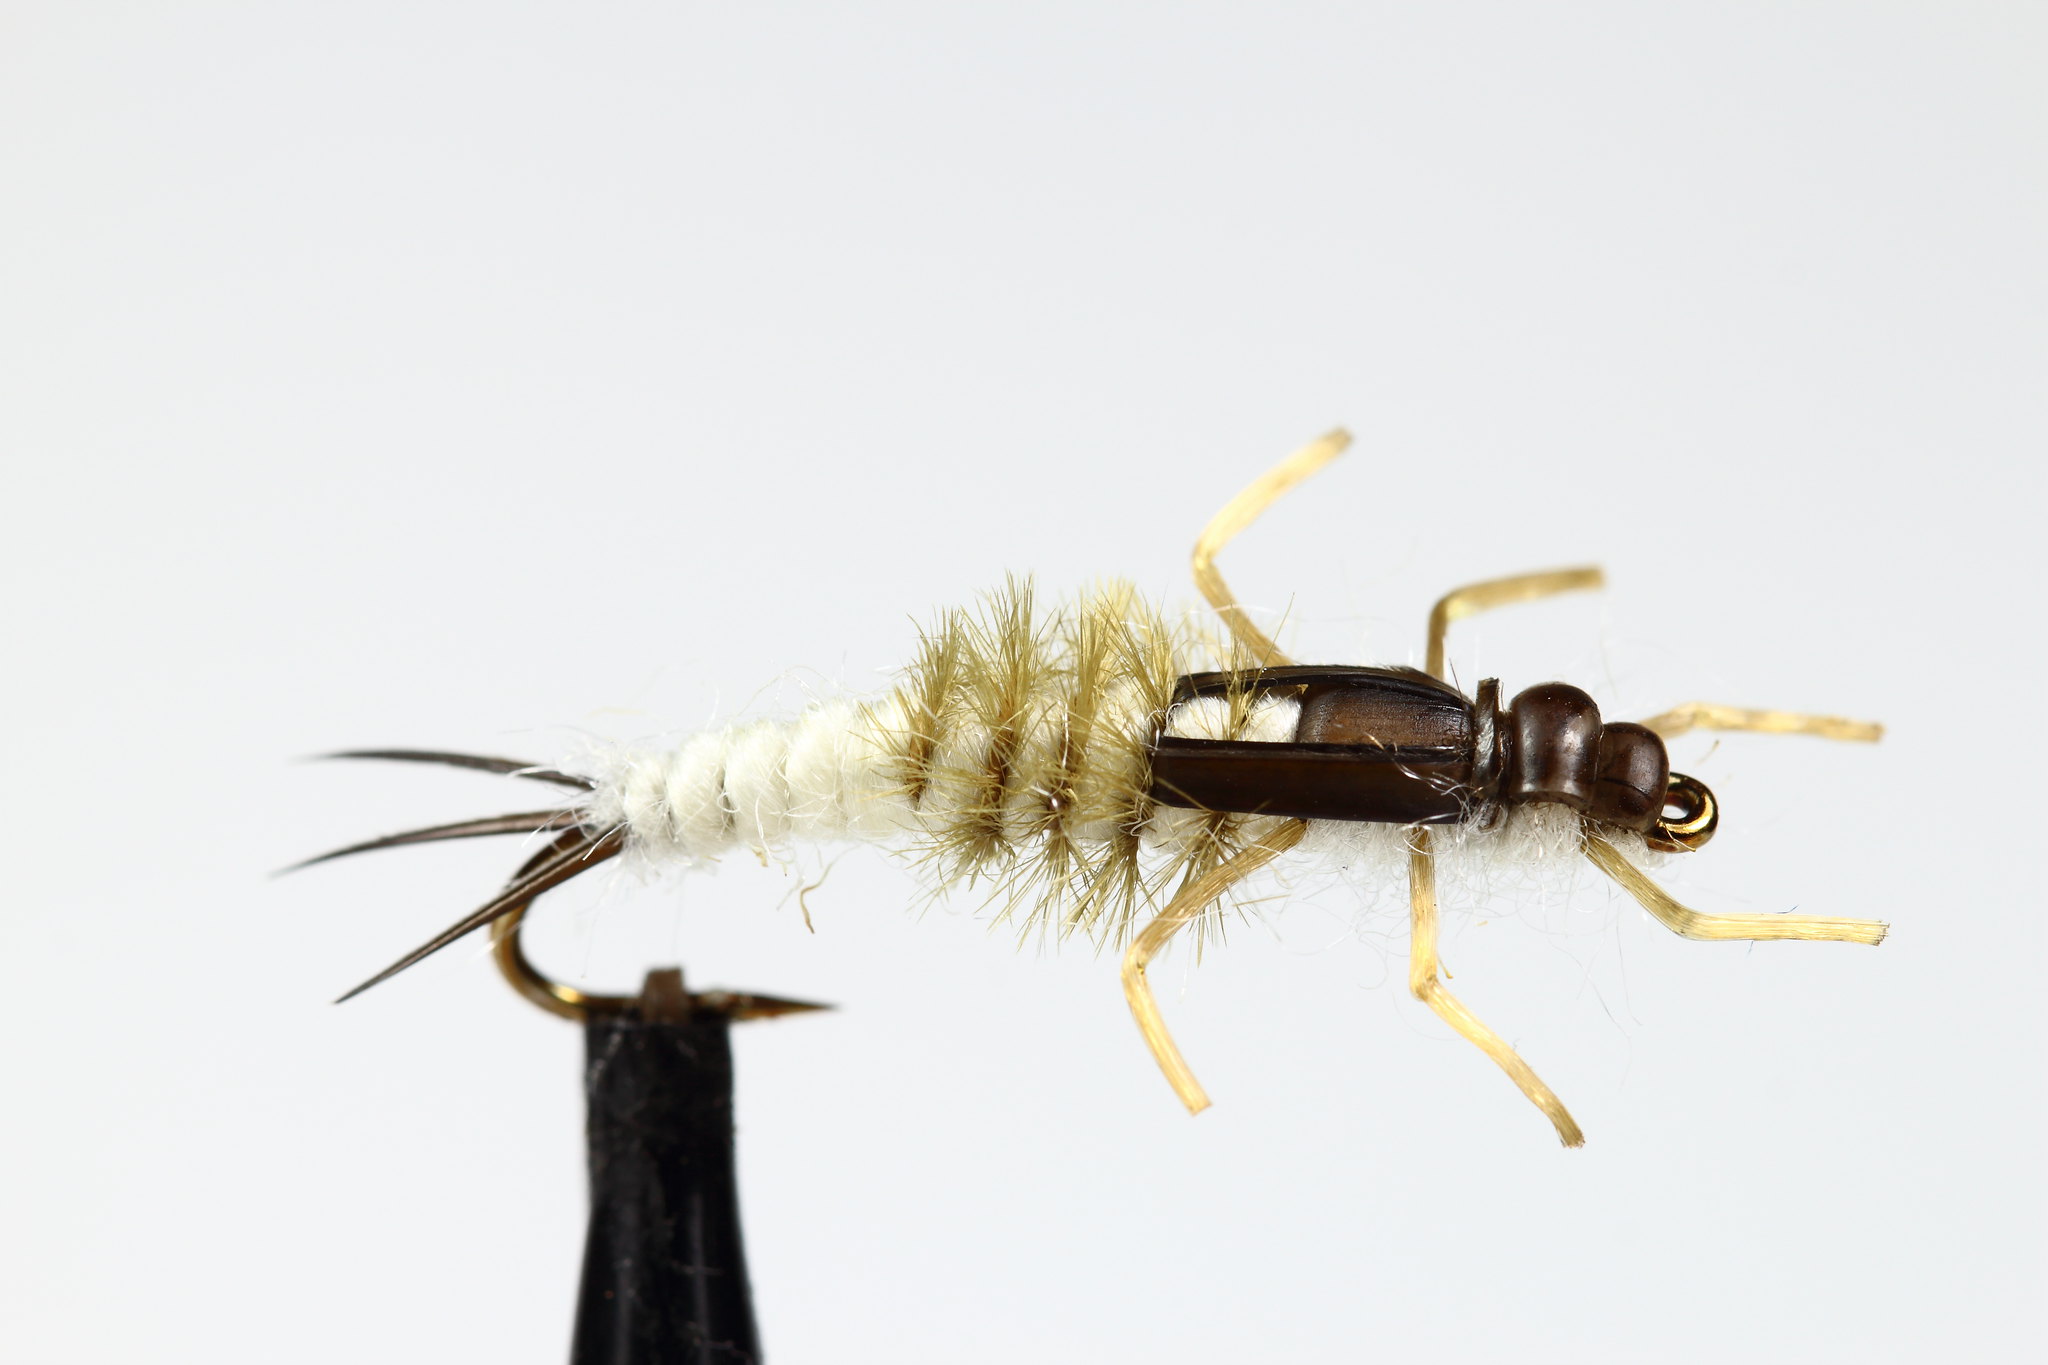
Pull the Nymph Skin over the dubbing to form the thorax cover, you will need a small amount of tension to make the Nymph Skin behave, tie the Nymph Skin down to the eye. Then tie in the biots, you can do this individually or together at the same time, try to keep the gap between the biots.
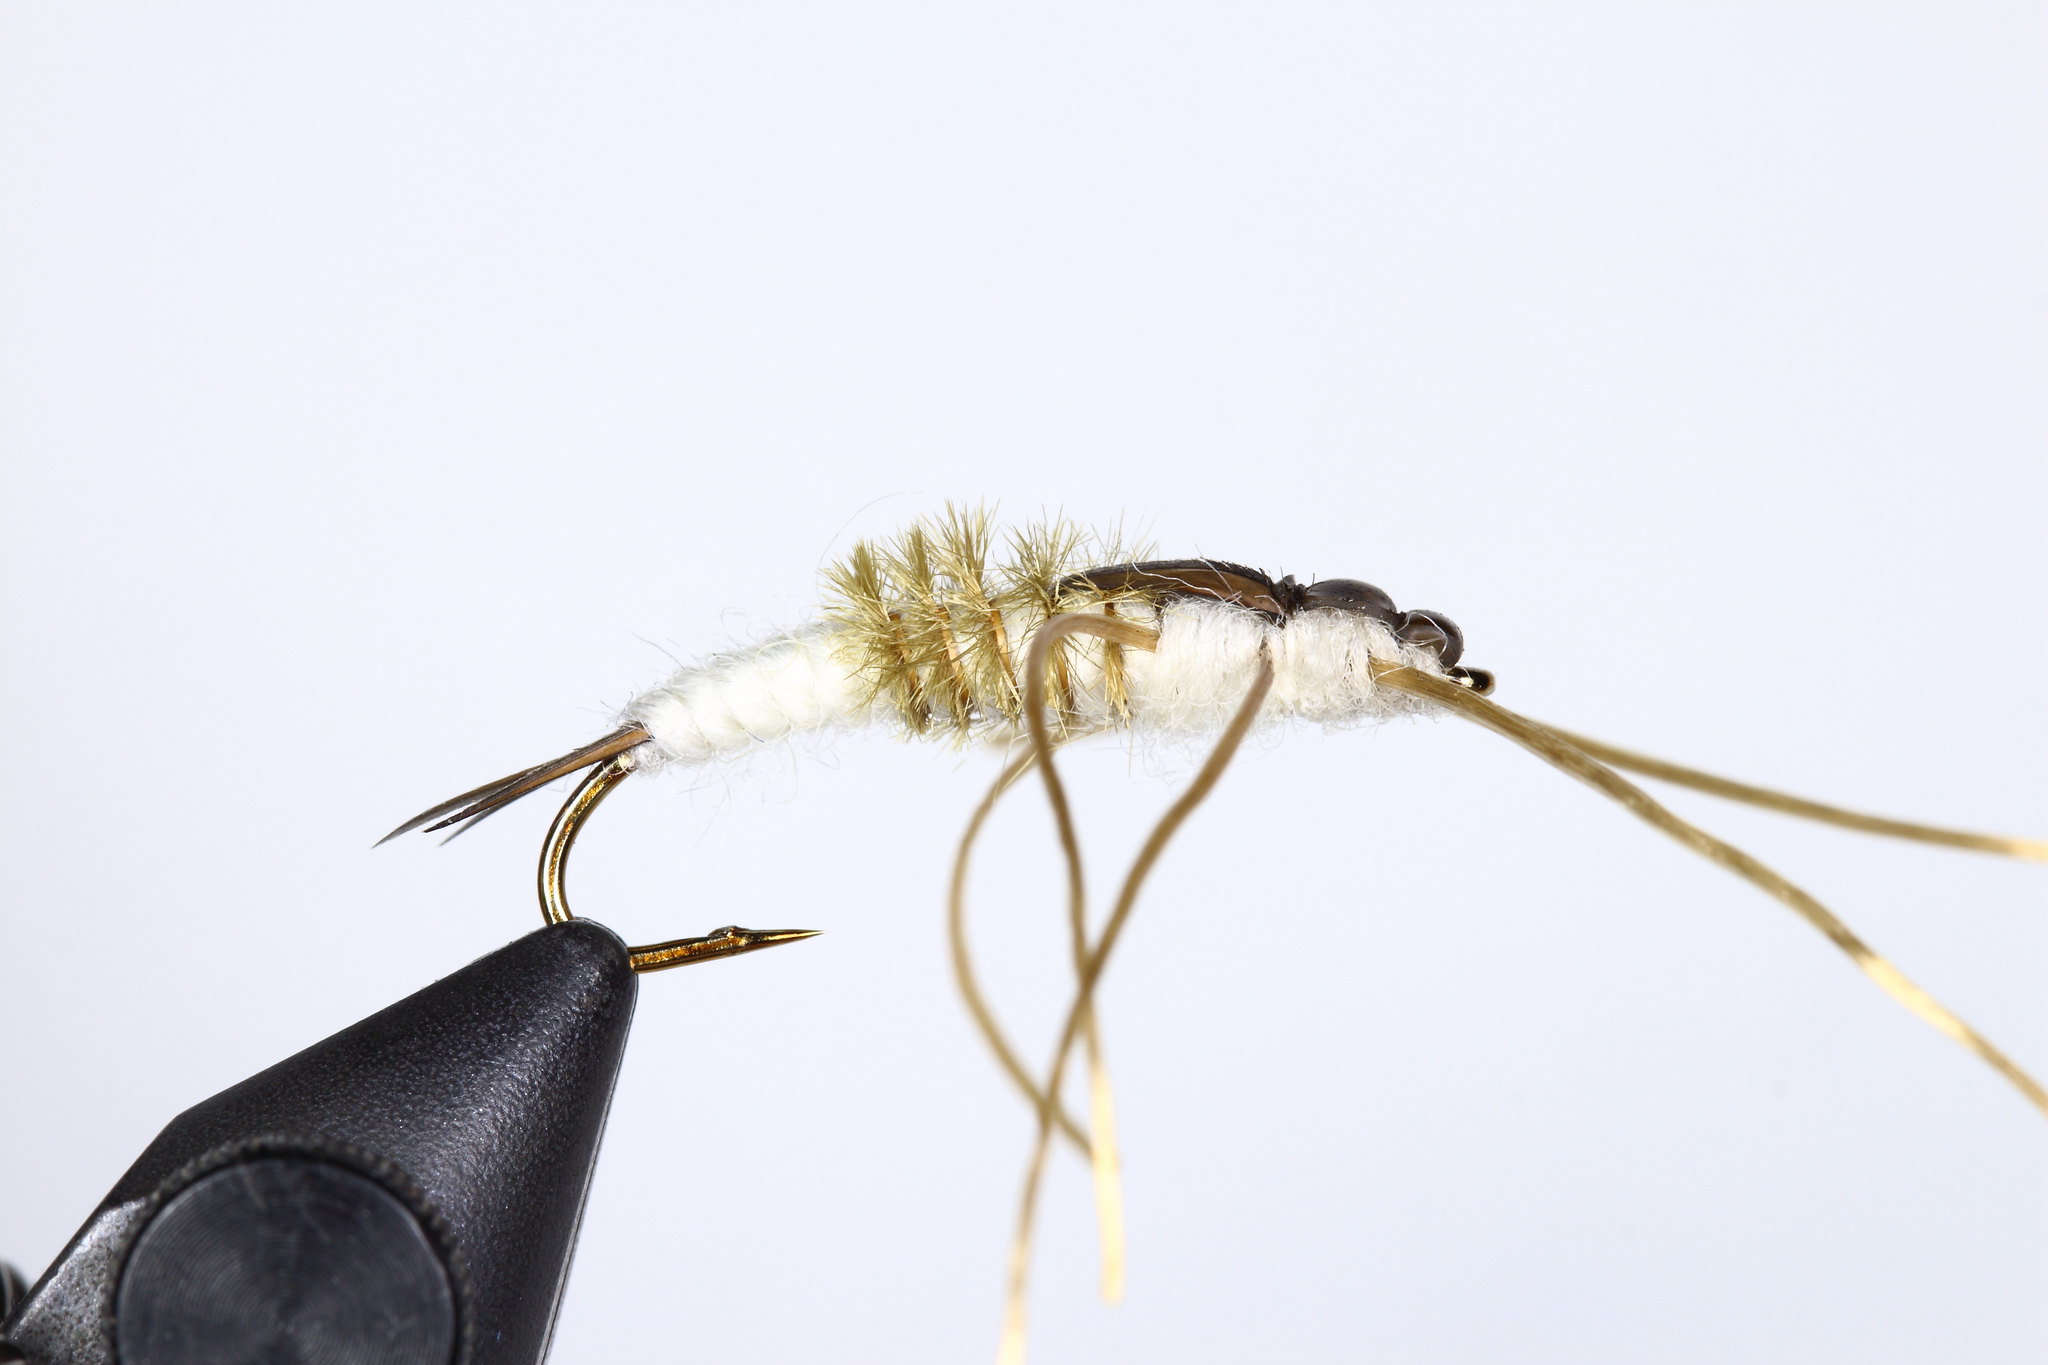
Apply a smallish amount of dubbing to the thread and form a small head behind the eye, pull over the Nymph Skin and tie down securely with a couple of wraps of thread. Then tie in another set of legs each side of the hook; trim off the legs pointing backwards so the front set of legs point directly forward.
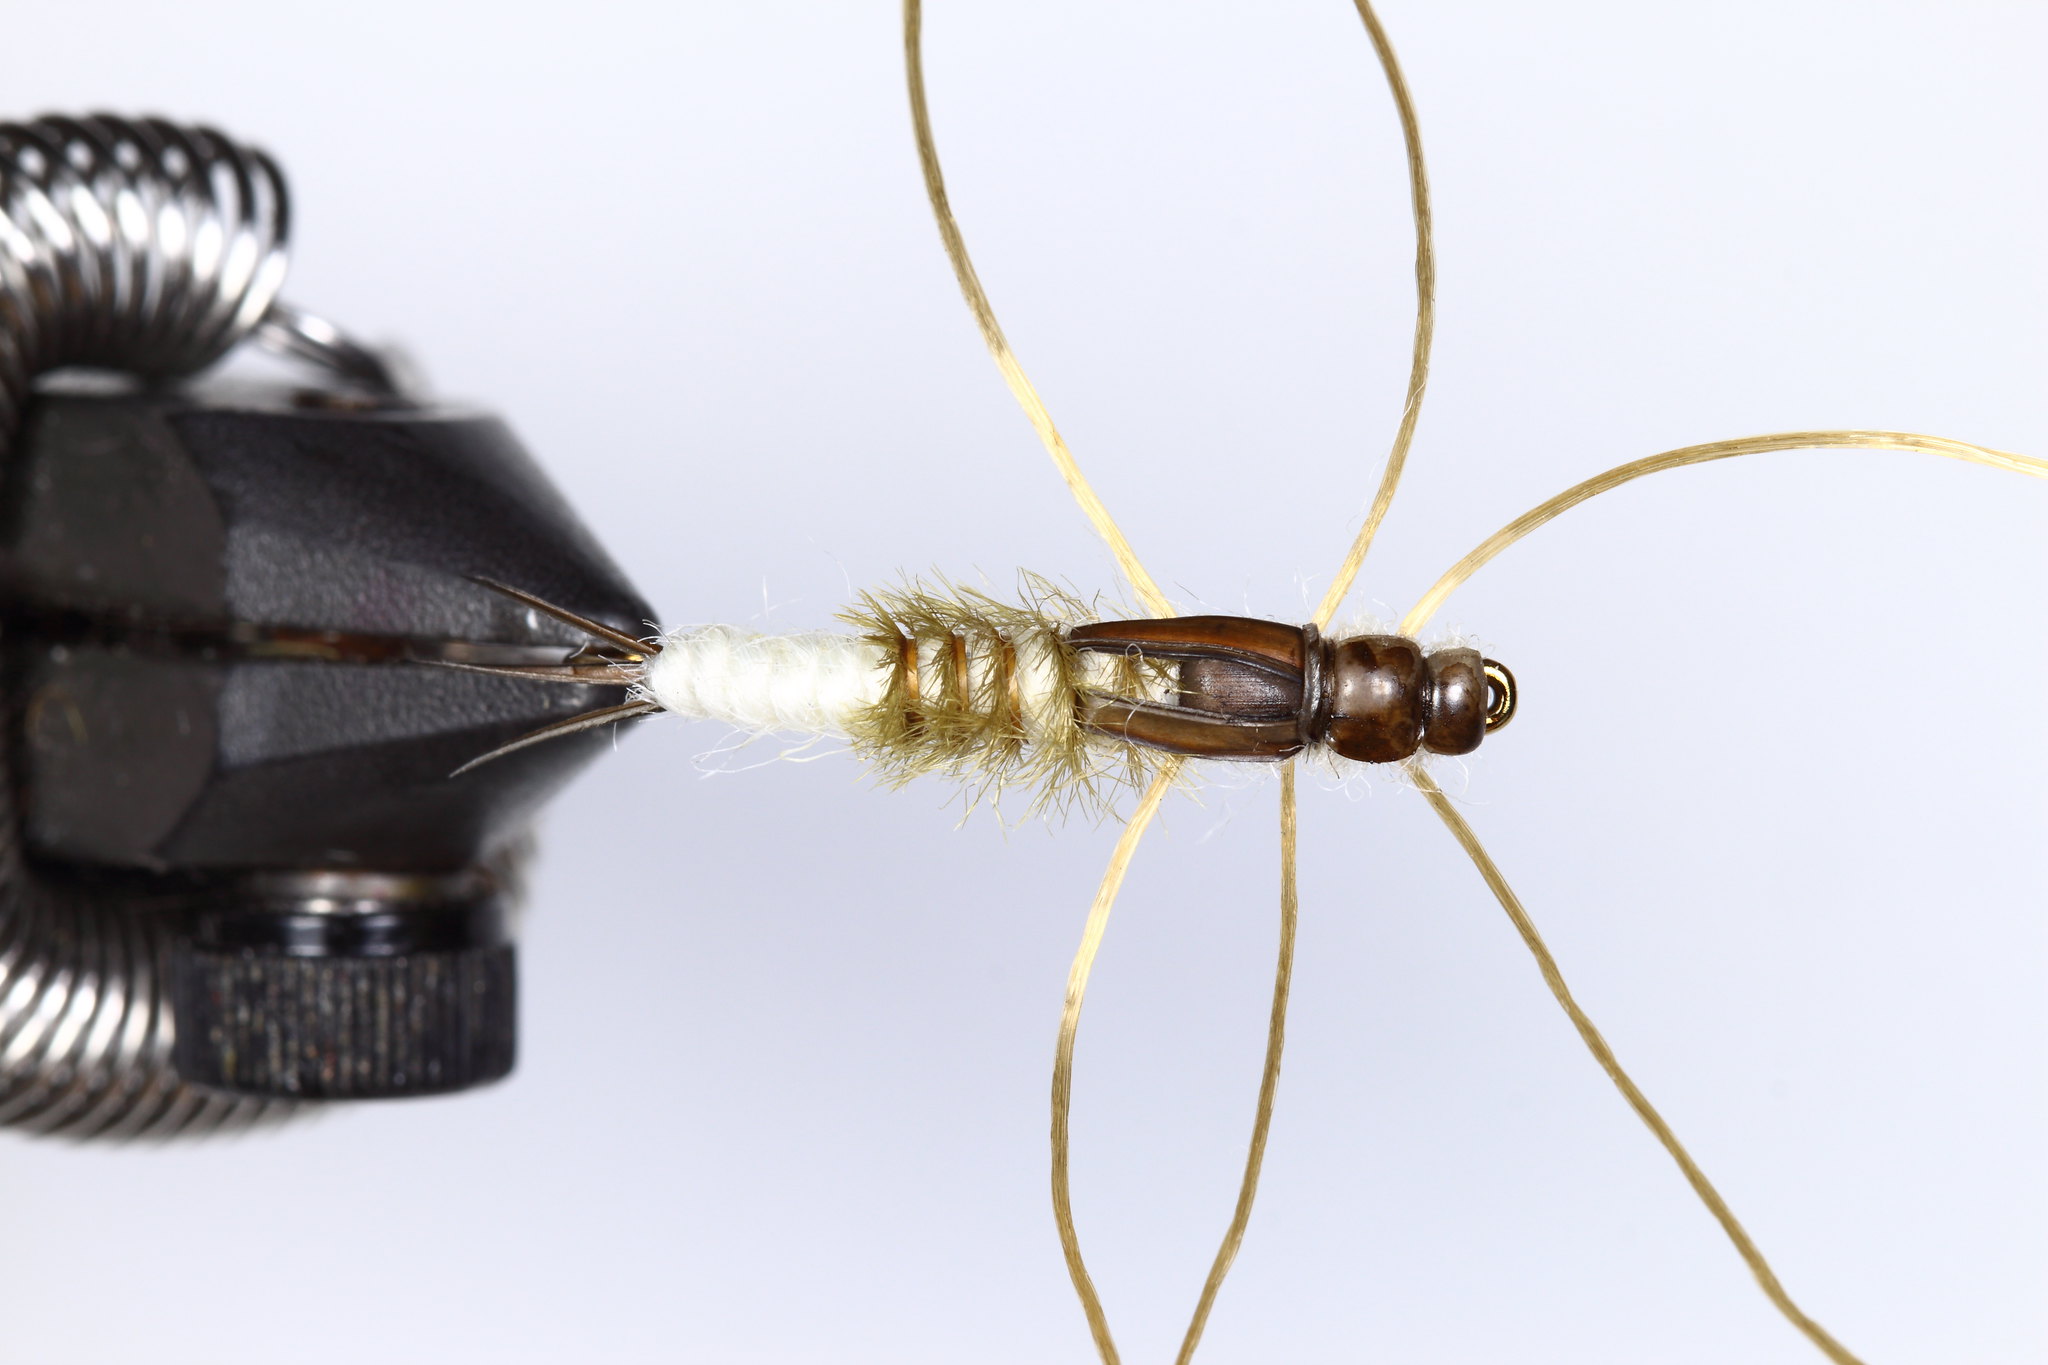
Again dub the thread and fill out the remaining part of the thorax, again use the dubbing to position the legs. Pull over the Nymph Skin and cover the last section of thorax (officially called the protonum), whip finish and cut the thread and trim the Nymph Skin. Re-colour the thorax cover and head if necessary. Readjust the fly so it is pointing down and kink the legs using a hot-tip cauteriser, cut the legs to length.
No comments:
Post a Comment